
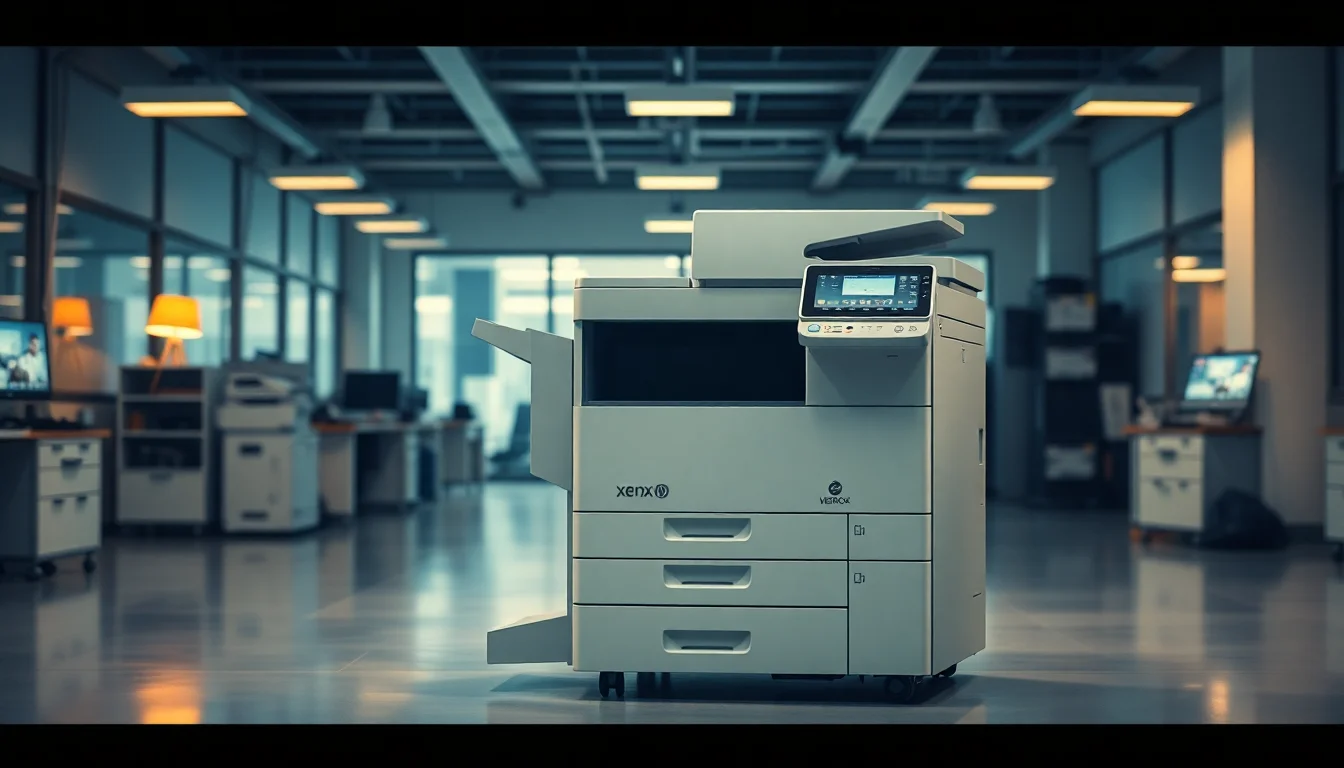
Your Xerox Versant 180 Press is throwing errors and you need to know straight away: is this a hardware death sentence or a quick fix? Stop panicking. In 15 years doing remote support on these machines, I can tell you that roughly 95% of Versant 180 issues are recoverable. Most fall into three buckets: paper jams, driver misconfiguration, or network connectivity problems. The actual fatal hardware faults are rare, and when they do happen, they're obvious (fuser failure, drum corruption, sensor malfunction). This guide walks you through the diagnostic steps to figure out which category you're in, and then tackles every recoverable fix you'll need.
What Causes Xerox Versant 180 Fatal or Recoverable Errors?
Before you dive into fixes, you need to understand the difference. A fatal error means the press cannot print at all and the root cause is internal hardware that only a service technician can repair. Examples include a fuser unit at end-of-life, a drum unit with corruption, or a registration sensor that has failed. These errors will show specific service codes on the touch panel (usually error codes like SC ### or HE ###), and they prevent the machine from initialising or running even internal tests.
A recoverable error, by contrast, is something you can diagnose and fix yourself or resolve with driver and network reconfiguration. Paper jams, incorrect tray settings, outdated drivers, network IP mismatches, WSD connection drops, and corrupted PDF or PostScript jobs all fall into this category. The machine might say Ready but nothing prints, or it prints a page and then refuses the next job, or it jams and you need to clear the path. These are the bread and butter of remote support.
The key diagnostic move is simple: print an internal test page directly from the press UI. If that page comes out clean, your Versant 180 hardware is functioning. The error is on the Windows side, the network side, or in how your job is formatted. If that internal test fails or the press shows a service code that references fuser, drum, registration, or sensors, you are looking at hardware and you need to call Xerox or your service provider. Do not waste time chasing driver updates or network settings when the hardware itself is broken.
Xerox Versant 180 Fatal or Recoverable: Quick Fix
Check Panel and Clear Any Jams Easy
- Look at the Versant 180 touch screen.
Read the error message or jam location indicator. The panel will tell you exactly which path or tray has a problem. - Open the indicated doors and covers.
Follow the arrows and labels printed on the machine. Open all access panels in the area where the jam is reported. - Remove any stuck paper gently.
Pull in the direction of the paper path. Do not rip it; work slowly if the paper tears. Remove all fragments. - Close all doors firmly until they latch.
The machine will not resume operation until every door and tray is fully closed and latched. You will hear or feel a click. - Check the touch screen again.
If the jam indicator clears and the machine says Ready, power-cycle the press (power off for 30 seconds, then back on) to reset the jam sensor.
Verify Paper and Tray Settings Match Stock Easy
- At the press UI, go to Tray Settings.
Check the configured size, type, weight, and colour for each tray. - Open the physical trays and verify the loaded stock.
Does the A4/Letter setting match the paper in the tray? Is the weight correct (80 gsm, 100 gsm, etc.)? Is the colour right? - If settings do not match the stock, update them.
Edit the tray configuration at the press UI. Change size, type, weight, or colour to match what is actually loaded. - In the Windows print dialog, select the correct tray.
Avoid Automatically Select Tray. Choose a specific tray with verified stock. - Print a test page.
Send a small test job from Notepad or Word to confirm the press picks from the right tray and the paper comes out cleanly.
Power-Cycle Press and Clean Windows Queue Easy
- At the press UI, select Power Down (or Shutdown) from the menu.
Do not pull the power cable. Use the proper shutdown procedure. - Wait 30 seconds for the press to fully stop.
The touch screen will go dark. - Power the press back on and wait for initialisation.
The startup cycle takes about 2 to 3 minutes. Wait for the Ready light. - On your Windows PC, open Devices and Printers.
Find the Versant 180 in the list. - Right-click the press, select Print Queue (or Open queue).
Look for stuck jobs (jobs that say Paused or Error). - Right-click each stuck job and select Cancel.
If a job stays in Deleting, open Command Prompt as Administrator and run:net stop spooler - Wait 5 seconds, then run:
net start spooler
This restarts the Windows Print Spooler service and clears the stuck job.
Print an Internal Test Page to Diagnose Hardware Easy
- At the Versant 180 UI, go to Machine Status or Reports.
Look for an option to print Configuration Report, Demo Page, or Test Page. - Select Print Test Page (or Configuration Report).
Do not print from Windows; print directly from the press UI. - Check the output.
Does a clean page come out? Is the image quality good? - If the test page prints cleanly: Your hardware is healthy. Go to the Intermediate section (driver and network fixes).
- If the test page fails, jams, or the press shows a service code (SC ### or HE ###): Record the exact code and proceed to the Advanced section. This likely requires service.
More Xerox Versant 180 Fatal or Recoverable Solutions
Confirm and Reconfigure Network Settings Medium
- At the Versant 180 UI, log in as System Administrator.
You will need the admin PIN if one is set. - Navigate to Machine Status, Tools/Device Settings, then Network Settings.
The path varies slightly depending on your firmware version, but Network Settings is always under the admin menu. - Write down the current IP Address, Subnet Mask, and Default Gateway.
Check these against your network topology. Are they correct for your building or department subnet? - If the IP is wrong, edit it to the correct address.
Consider setting a static IP or working with your network team to reserve an IP in DHCP so the press never changes. - Exit the press UI and go to your Windows PC.
Open Control Panel, then Devices and Printers. - Right-click the Versant 180 queue and select Printer Properties.
Go to the Ports tab. - Check the port type and IP address.
Is it a Standard TCP/IP Port with the correct IP? If it says WSD or the IP is old, you need to fix this. - If the port is wrong, delete it and create a new Standard TCP/IP Port.
Select Add Port, choose Standard TCP/IP Port, and enter the press IP you verified above. - Set this port as the default (select Set as Default Port).
Do not mix WSD and Standard TCP/IP on the same printer queue. - Print a test page from Windows.
If the port is now correct, the page should print.
Reinstall the Correct Xerox or Fiery Driver Medium
- Visit the Xerox support website and search for Versant 180 drivers.
Download the PostScript driver or the Fiery driver for your exact Windows version (Windows 10, Windows 11, Windows Server 2019, etc.). - On your Windows PC, open Devices and Printers.
Right-click the Versant 180 queue and select Remove Device. Confirm removal. - If there are multiple Versant 180 queues, remove all of them.
Duplicates cause conflicts. - Open Control Panel, Devices and Printers, Print Server Properties (you may need to click the menu icon at the top).
Go to the Drivers tab. - Select old Xerox or Fiery drivers for the Versant 180 model and remove them.
This clears the old driver package so Windows does not auto-reinstall it. - Restart your PC.
This ensures all driver files are fully unloaded. - Extract the driver download to a folder (if it is a ZIP file).
Locate the INF file or setup executable in the extracted folder. - Go to Devices and Printers, click Add a Printer.
Select Add a local printer or network printer. Choose Use an existing port and select the Standard TCP/IP port with the press IP you set up earlier. - When prompted for a driver, select Have Disk (or Browse) and navigate to the driver INF or setup file you downloaded.
Windows will install the correct driver. - Set print defaults: page size, colour mode, duplex, finisher options.
Match these to your physical Versant 180 configuration. - Print a test page from Windows.
If the driver is correct, the page should print cleanly.
Check and Standardise PDF and Job Format Medium
- If you are sending jobs from a design or office application, export to PDF first.
Use a standard format like PDF/X-1a (for print) or PDF/X-4 (for print with transparency). Do not use generic PDF. - In the print driver's Properties or Advanced tab, check the following settings:
PostScript Level (use PS3 or higher), Colour Mode (match your workflow), Print as Image (leave off unless troubleshooting specific corrupted content). - Match colour management: if your application manages colour, set the driver to application-managed; if the printer manages colour, set the driver to printer-managed.
Mismatches cause colour shifts and RIP errors. - For complex jobs (high resolution images, transparency, spot colour): Test print a small subset first. Do not print 500 copies of a job you have not verified.
- If a specific job causes the press to hang or show a RIP error, try printing that job from a different application or in a simpler format (e.g., print to PDF instead of direct PostScript).
This isolates corrupted data.
Clear and Recreate Custom Media Settings Medium
- At the Versant 180 UI, log in as System Administrator.
- Go to Machine Settings, Paper/Tray Settings, then Custom Stocks or Paper Catalogue.
- Review your custom media entries.
Are there entries with unusual or incorrect values (e.g., weight as 9999, size as custom 99x99 mm)? - Delete any suspicious or unused custom stock entries.
These can confuse the press and cause misfeeds. - For each stock you actually use, create a new entry with verified specifications:
Name (e.g. Bright White 100gsm A4), Size (A4 or 210x297 mm), Basis Weight (100 gsm), Type (Bond, Coated, etc.), Coating (Glossy, Matte, None). - Save the custom stock and assign it to the appropriate tray.
- Print a test page using that tray.
Verify the paper feeds and prints correctly.
Advanced Xerox Versant 180 Fatal or Recoverable Fixes
Deep Spooler Cleanup on Windows Hard
- Open Command Prompt as Administrator.
Right-click Command Prompt and select Run as Administrator. (Or search for cmd in the Start menu, right-click it, and select Run as Administrator.) - Type:
net stop spoolerand press Enter.
You will see a confirmation message. The Print Spooler service is now stopped. - Navigate to the spool folder:
C:\Windows\System32\spool\PRINTERS
Open File Explorer and paste this path in the address bar, or navigate manually through folders. - Select all files in the PRINTERS folder (Ctrl+A) and delete them.
If a file is in use, Windows will skip it. That is okay. - Go back to Command Prompt and type:
net start spooler
Press Enter. The service restarts and the spool folder is now clean. - Open Devices and Printers to confirm the printer queue is empty.
No jobs should be listed. - Print a test page from Notepad or Word.
If the spooler was corrupted, this should now work.
Remove and Fully Reinstall the Printer Device Hard
- Open Devices and Printers on your Windows PC.
Right-click the Versant 180 queue and select Remove Device. Confirm. - Open Control Panel, Devices and Printers, Print Server Properties (click the menu icon at the top).
Go to the Drivers tab. - Find every driver entry for Versant 180 or Fiery in the list.
Select each one and click Remove. If you are unsure whether a driver is related, see if the name contains "Versant", "Fiery", or "Xerox". - Reboot your Windows PC.
This clears all driver references from system memory. - Download the latest Xerox Versant 180 driver from Xerox support.
Ensure it matches your Windows version exactly (64-bit Windows 11, etc.). - Extract the driver to a folder if it is a ZIP file.
- Go to Devices and Printers, click Add a Printer.
Select Add a local printer. Choose the Standard TCP/IP port with the correct press IP. - When prompted for a driver, select Have Disk and navigate to the driver INF file.
Complete the installation. - Set print defaults (page size, colour, finisher options).
- Print a test page.
If everything is clean, your printer is now fully fresh.
Network Diagnostics and Firewall Verification Hard
- On your Windows PC, open Command Prompt and type:
ping 192.168.1.100
Replace 192.168.1.100 with your actual press IP. If the press responds, you see replies with latency (e.g., "Reply from 192.168.1.100: bytes=32 time=5ms"). If you see "Timed out" or "Unreachable", the press is not on the network or is offline. - If ping fails, check that the press IP is correct at the press UI (Machine Status, Network Settings).
Confirm your PC is on the same subnet. If the PC and press are on different subnets or different VLANs, you need network team coordination. - If ping succeeds but Windows still shows the press offline, type:
tracert 192.168.1.100
This shows the network path to the press. If there are many hops or unexpected routing, your network may have issues. - Check your Windows Firewall or third-party firewall.
Go to Windows Defender Firewall, click Allow an app through the firewall, and ensure Print Spooler is allowed (both Private and Public networks if applicable). - If your organisation has a firewall appliance (Cisco, Palo Alto, etc.), check with your network team that port 9100 (Xerox print port) and port 631 (IPP/HTTP) are allowed between your PC and the press IP.
- If the press is on a different VLAN, ensure mDNS, Bonjour, or SMB browsing is allowed across VLANs, or use a static TCP/IP port instead of WSD.
- After each change, power-cycle the press and restart the PC, then test again.
Fiery or Controller Software Reset Hard
- At the Versant 180 UI, log in as System Administrator.
- Go to Machine Settings, Tools/Service, or System Settings (the menu structure varies).
Look for an option called Reset, Restore Defaults, or Clear All Settings. - Select Clear Active Jobs or Clear Print Queue from the Fiery or controller menu.
This empties the press-side job buffer without resetting the entire machine. - If the press continues to show RIP (Raster Image Processor) errors with every job, a firmware or controller software update may be needed.
Do NOT attempt this yourself. Contact Xerox or your service provider. Firmware updates require trained technician supervision. - If you want to reset network and print settings to factory defaults (last resort): Go to Restore Defaults or Factory Reset, confirm the action, and allow the press to reboot. You will need to reconfigure the IP address and network settings afterwards.
- After any reset, power-cycle the press and wait for full initialisation.
Reconfigure network settings if needed and run a test page.
Hardware Fault Escalation and Service Codes Hard
- If internal test pages fail consistently, or the press shows error codes like SC 542 (fuser), SC 451 (drum), or HE 100 (sensor), you are looking at hardware.
These are not recoverable without service. - At the press UI, go to Machine Status or Reports and print the Configuration Report.
Also print the Fault History or Error Log if available. These documents are gold for the service technician. - Note the exact service codes and error messages.
Take a photo of the touch screen if the code is not yet in the printout. - Note how many pages have printed since the last error and whether jams are happening at a specific location repeatedly.
Service technicians use this context to narrow down root cause. - Contact Xerox support or your service provider.
Provide the exact service codes, the Configuration Report, the Fault History, and a description of what you have already tried. Mention that internal test pages fail or jam at a specific location. - Do not open the press or attempt to clean internal components unless you are a trained technician.
Fuser units, drums, and registration sensors are complex and can be damaged by improper handling.
Preventing Xerox Versant 180 Fatal or Recoverable Issues
Once you have fixed the immediate problem, lock in these practices to avoid Versant 180 drama in future.
Use approved media and keep the Paper Catalogue accurate. Stock only media that Xerox recommends for the Versant 180. When you load a new ream or change suppliers, update the Paper Catalogue entry with the verified size, basis weight, type (Bond, Coated, Glossy), and coating information. Do not lazily assume "close enough". The press is fussy about tolerances. An 80 gsm stock loaded into a 100 gsm slot will cause misfeeds. A glossy stock in a matte slot can cause toner adhesion issues.
Assign a static IP or DHCP reservation. If your DHCP server hands out a new IP to the Versant 180 every month, Windows will lose connection and show the press offline. Work with your network team to either assign a static IP (e.g. 192.168.1.100) or create a DHCP reservation so the press always gets the same address. This single move eliminates roughly 20 percent of connectivity issues.
Clean feed rollers and registration areas on schedule. The Xerox Versant 180 user documentation specifies cleaning intervals for feed rollers and registration areas (usually every 250,000 to 500,000 pages depending on usage). Mark these on a calendar. Use only the cleaning methods specified in the documentation. Worn or dirty rollers cause jams and misfeeds that look like hardware failure but are actually preventable wear.
Keep firmware and drivers current. When Xerox or Fiery releases firmware or driver updates, test them on a non-critical machine first, then roll them out. Updates often fix RIP errors, improve network stability, and add support for new media types. Do not lag more than one or two versions behind.
Standardise your PDF and print settings. If your team is exporting from InDesign, Adobe Acrobat, or Microsoft Office, standardise on PDF/X-1a (for standard print) or PDF/X-4 (for jobs with transparency). Configure your print driver with standard defaults (colour space, PostScript level, page size). Train operators on these settings so every job follows the same path. Consistency eliminates one-off RIP errors.
Use Standard TCP/IP ports instead of WSD in production. WSD (Web Services for Devices) is convenient for discovering printers on a network, but it can cause connection drops if the press IP changes or if network discovery is slow. For any production Versant 180, always configure a Standard TCP/IP port with a static or reserved IP. This adds one extra step during setup but saves weeks of troubleshooting later.
Print and file the Configuration Report quarterly. Every 3 months, print the Configuration Report from the press UI and store it (physically or scanned). Document the IP address, custom stocks, finisher configuration, and consumable page counts. If the press fails, you have instant context for the service technician. You also spot trends (e.g., the developer is being replaced more often than expected, which signals a potential issue).
Xerox Versant 180 Fatal or Recoverable: Summary
You now know the difference between fatal and recoverable Xerox Versant 180 errors, and you have a clear diagnostic path. Start with the Quick Fix section: clear any jams, verify paper settings, power-cycle, and print an internal test page. If the test page prints cleanly, your hardware is healthy and the issue is Windows or network-related. Move to the Intermediate section (driver reinstall, network configuration) and you will likely be printing again within an hour. If the test page fails or the press shows service codes, note the code, gather the Configuration Report and Fault History, and contact Xerox service. A trained technician will handle the hardware repair. Most importantly, do not panic. Ninety-five percent of Versant 180 issues are user-fixable, and the rest are predictable hardware failures that service can address quickly if you have the right diagnostic data ready.