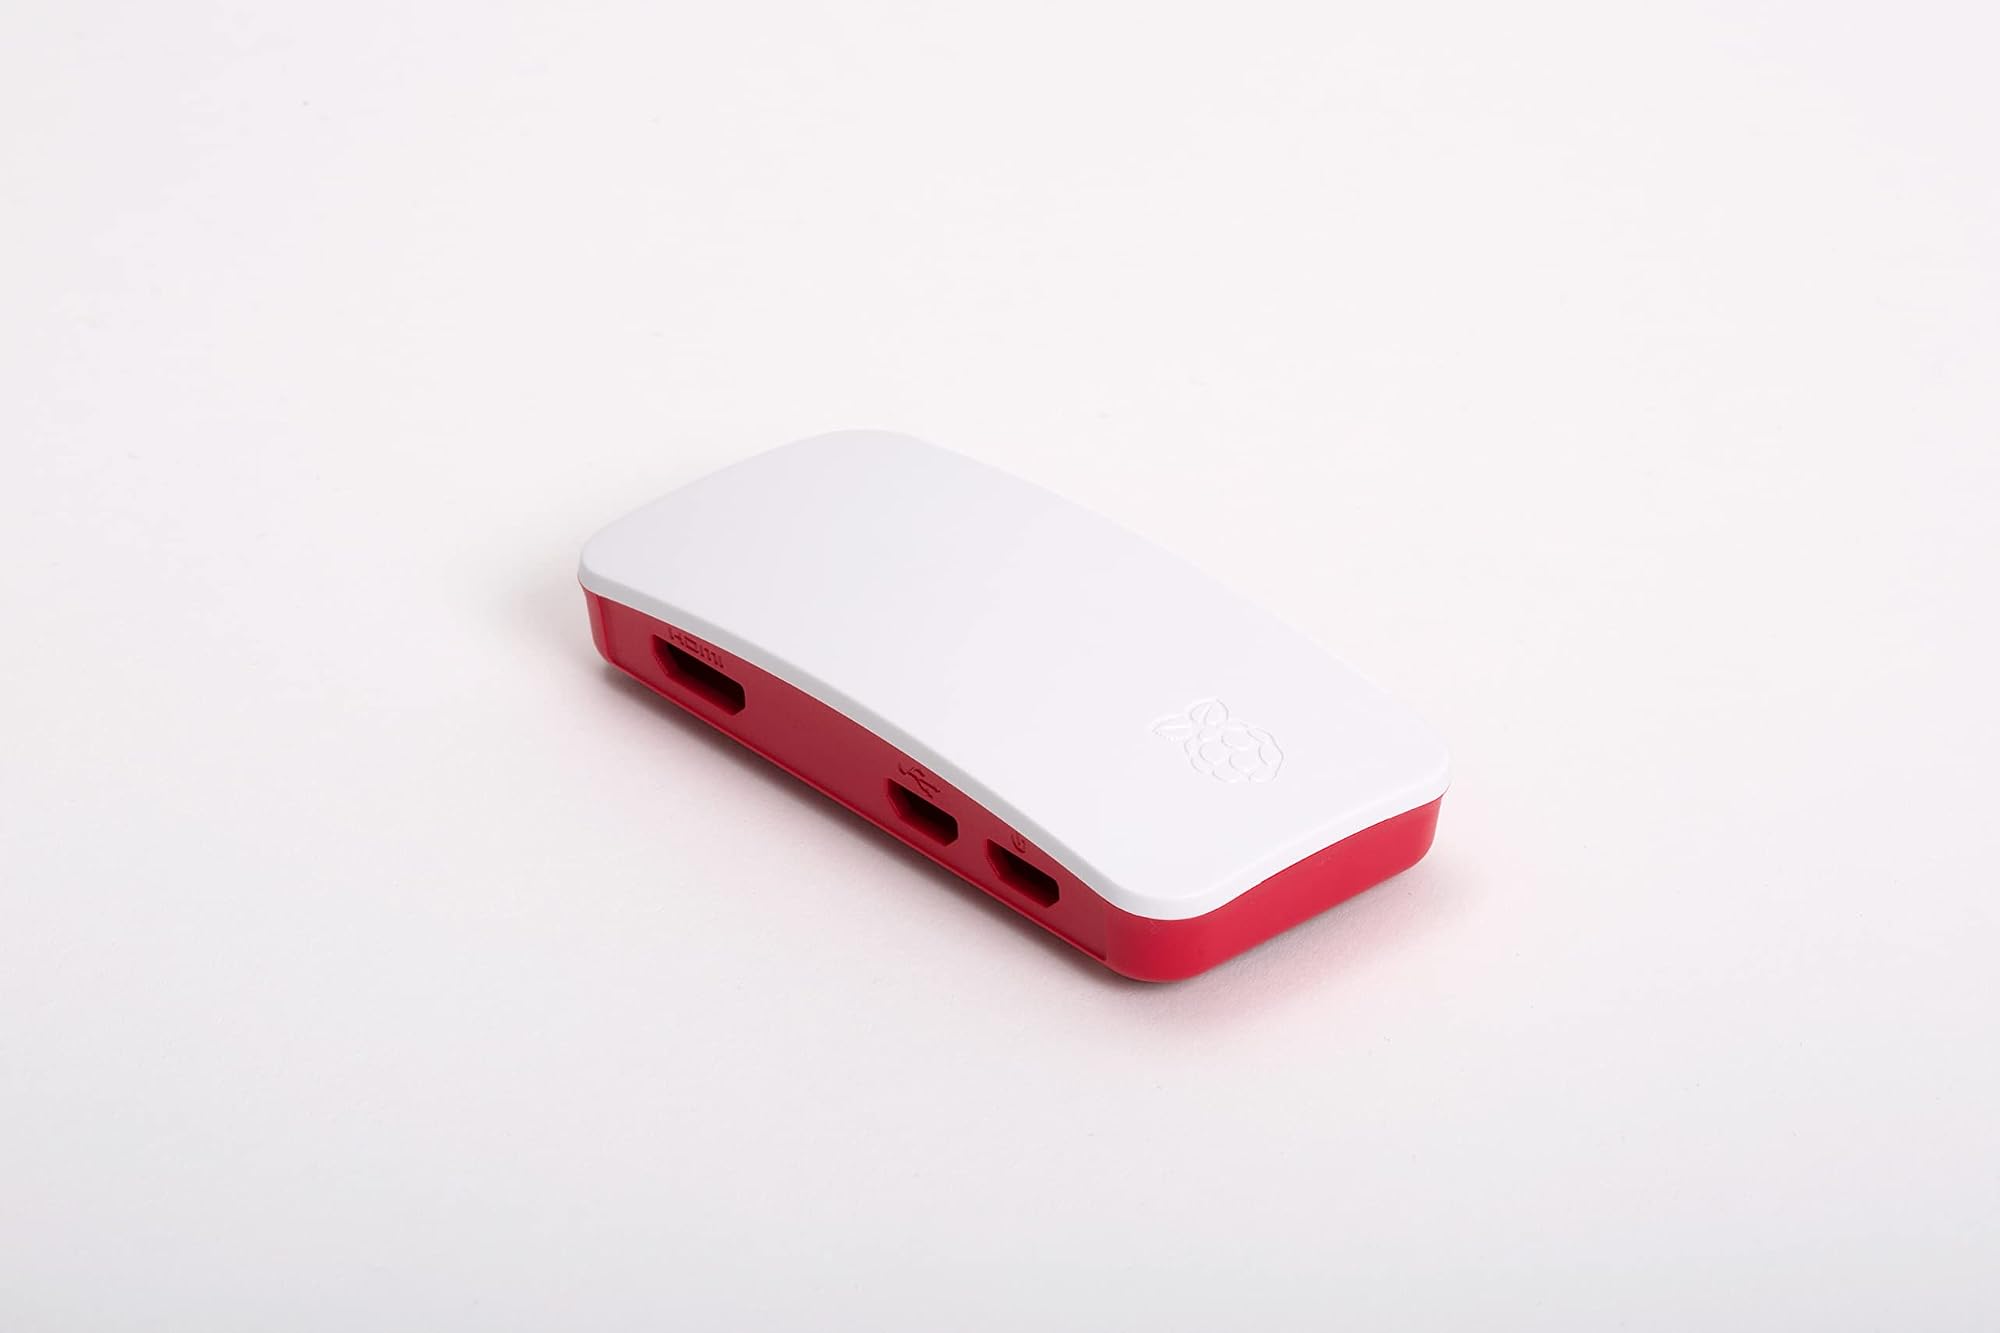
Raspberry Pi Zero Case
- Three lid options included (blank, camera, GPIO) for different project needs
- Excellent port cutout quality and alignment
- Tool-free snap-fit assembly that stays secure over time
- No ventilation means thermal throttling risk on Pi Zero 2 W under sustained load
- ABS plastic feels less premium than aluminium alternatives
- No mounting points or wall-mount options included
Three lid options included (blank, camera, GPIO) for different project needs
No ventilation means thermal throttling risk on Pi Zero 2 W under sustained load
Excellent port cutout quality and alignment
The full review
15 min readRight, let's be honest about something. The case market, whether you're talking full-size ATX towers or tiny SBC enclosures, is absolutely littered with products that look decent in product photos and then disappoint the moment you actually try to use them. Flimsy panels, ports in awkward spots, ventilation that's more decorative than functional. I've built in enough enclosures over the past twelve years to know the difference between something designed by engineers who actually use the thing and something knocked out to hit a price point. So when the official Raspberry Pi Zero Case UK landed on my desk, I was curious. This isn't a mid-tower with a tempered glass side panel and RGB fans. It's a tiny injection-moulded enclosure for a credit-card-sized computer. But the same principles apply: does it protect the board, does it allow adequate airflow, and does it make your life easier or harder? I spent several weeks using it across a few different Pi Zero W 2 projects to find out.
The Raspberry Pi Zero is a genuinely remarkable bit of kit. For a few quid you get a capable ARM-based computer that'll run lightweight Linux distributions, handle home automation tasks, act as a network monitor, or power a retro gaming setup. But a bare board sitting on your desk is asking for trouble. Static discharge, accidental shorts, dust ingress, someone knocking it off the shelf. You need a case. The question is whether the official one from Raspberry Pi themselves is the right answer, or whether you're better off with one of the dozens of third-party alternatives floating around.
I'll give you my honest take. No fluff, no padding. Just what I found after actually using it.
Core Specifications
Before we get into the build experience, let's lay out what you're actually getting. The official Raspberry Pi Zero Case is a two-part ABS plastic enclosure designed specifically for the Pi Zero form factor, which measures 65mm x 30mm. That's tiny. We're not talking about a case with drive bays or fan mounts here. This is a protective shell, and it needs to be judged on those terms rather than the criteria you'd apply to an ATX mid-tower.
The case ships with three different lid options, which is actually a thoughtful touch. You get a blank lid for fully enclosed use, a lid with a camera cable slot for use with the Pi Zero camera module, and a GPIO lid that leaves the 40-pin header exposed. That last one is particularly useful if you're using the Pi Zero in a project that requires access to the GPIO pins without pulling the board out of the case every time. The base of the case has a cutout for the microSD card slot, and all the port cutouts align with the Pi Zero's micro USB ports, mini HDMI output, and camera connector.
The material is standard ABS plastic, which is fine for this application. You're not going to get aluminium CNC machining at this price point, and honestly you don't need it. ABS is lightweight, reasonably impact-resistant, and easy to manufacture to tight tolerances. The fit on the Pi Zero W 2 I was using was snug without being a fight to assemble. The board clips in and the lid snaps on with a satisfying click. No screws required, which keeps things simple.
| Specification | Detail |
|---|---|
| Compatible Board | Raspberry Pi Zero, Zero W, Zero 2 W |
| Material | ABS Plastic |
| Lid Options Included | 3 (blank, camera, GPIO) |
| Dimensions (approx) | 68mm x 33mm x 16mm |
| Colour | White / Red (official Pi colours) |
| Fan Support | None |
| Drive Bays | None (microSD via board slot) |
| Port Cutouts | Micro USB x2, Mini HDMI, Camera, microSD |
| Assembly | Tool-free snap fit |
| Brand | Raspberry Pi |
| Amazon Rating | ★★★★½ (4.5) (90 reviews) |
| Price | £7.99 |
Form Factor and Dimensions
The Pi Zero Case is about as small as a case can reasonably be. At roughly 68mm x 33mm x 16mm, it's smaller than a standard USB stick in two dimensions and barely taller than a couple of stacked credit cards. That's the point. The Pi Zero itself is designed to disappear into projects, tucked behind a monitor, embedded in a custom enclosure, or hidden inside a prop. This case keeps that philosophy intact while adding a layer of protection.
On a desk, it takes up almost no space. I had one running as a network monitor next to my main build for several weeks and genuinely forgot it was there half the time. The footprint is so small that you can velcro it to the back of a monitor, mount it inside a cabinet, or just leave it on a shelf without it being in the way. That's a genuine practical advantage over bare-board operation, where you're constantly worried about accidentally knocking the thing or dropping something on it.
The form factor does impose some real limitations, though. There's no room for a fan, no space for additional storage, and the port access is dictated entirely by the cutouts in the moulding. If you need access to something the case designers didn't account for, you're stuck. The three lid options help with this, particularly the GPIO lid, but if your project needs something unusual you may find yourself looking at a custom 3D-printed solution instead. For standard use cases, though, the form factor is exactly right.
Motherboard Compatibility
This is where reviewing a Pi Zero case through a PC case lens gets a bit interesting. There's no ATX, mATX, or mITX here. The Raspberry Pi Zero uses a completely proprietary board layout measuring 65mm x 30mm, and this case is designed exclusively for that form factor. It will fit the original Pi Zero, the Pi Zero W (which adds wireless connectivity), and the Pi Zero 2 W (which upgrades to a quad-core processor). It will not fit any other Raspberry Pi model. The Pi 3, Pi 4, and Pi 5 all use a larger 85mm x 56mm form factor and need their own cases entirely.
The standoff situation is non-existent in the traditional sense. The board doesn't use screws to mount to the base of the case. Instead, it relies on a friction fit with moulded plastic guides that locate the board precisely. This works well in practice. The board doesn't rattle around, it doesn't shift when you plug cables in, and it's easy to remove if you need to swap the microSD card or access something on the underside of the board. Whether that's better or worse than a screw-mount approach depends on your use case. For a permanent installation, screws would feel more secure. For a project where you're regularly swapping boards or cards, the tool-free approach is genuinely convenient.
One thing worth noting: the Pi Zero 2 W runs noticeably warmer than the original Pi Zero under load, thanks to its quad-core processor. The Pi Zero 2 W can hit temperatures that cause thermal throttling in an enclosed case. I'll cover this properly in the airflow section, but it's worth flagging here as a compatibility consideration. The case fits the board, but whether it's the right case for sustained workloads on the Zero 2 W is a different question.
GPU Clearance
There is no GPU clearance to speak of, because there is no GPU slot. The Raspberry Pi Zero uses an integrated Broadcom BCM2835 (original Zero) or BCM2710A1 (Zero 2 W) SoC with onboard graphics. There's no PCIe slot, no expansion bus, no way to add a discrete graphics card. If you're coming to this review from a traditional PC building background, that's the reality of the platform.
What the Pi Zero does have is a mini HDMI output, which the case accommodates with a properly sized cutout. The cutout is clean and precise on the unit I tested. No rough edges, no misalignment. The mini HDMI port is fully accessible and a standard mini HDMI cable seats properly without any clearance issues. That might sound like a low bar, but I've used third-party Pi cases where the HDMI cutout was slightly off-centre and you had to force the connector in at an angle. Not ideal when you're dealing with a small board that doesn't take kindly to lateral stress on its ports.
The camera connector is also accessible via the dedicated cutout on the side of the case, and if you're using the camera lid variant, the flat flex cable routes cleanly through the slot. I tested this with a Pi Zero camera module and it worked without any fuss. The flex cable sits flat, the lid closes properly, and the camera module sits at the correct angle. For a case at this price point, that level of attention to the camera interface is appreciated. It's clearly been designed by people who actually use these boards in real projects, not just spec'd out on paper.
CPU Cooler Clearance
Again, traditional PC case metrics don't map directly here. There's no CPU cooler in the conventional sense. The Pi Zero's SoC is passively cooled, and the case provides no mounting points for heatsinks or fans. The SoC sits directly under the lid of the case with a small air gap, and that's your thermal management sorted. Or not sorted, depending on your workload.
For the original Pi Zero running light tasks like a simple web server, network monitor, or low-intensity automation project, passive cooling inside this case is absolutely fine. The chip barely gets warm. I ran one as a Pi-hole DNS sinkhole for several weeks and temperatures stayed comfortable throughout. No throttling, no issues. But the Pi Zero 2 W is a different story. Under sustained CPU load, the Zero 2 W can hit temperatures where the processor starts to throttle back to protect itself. The enclosed case doesn't help with this.
If you're planning to run the Pi Zero 2 W at sustained high CPU utilisation, you have a few options. You can use the GPIO lid variant, which at least allows some convective airflow around the board. You can add a small adhesive heatsink to the SoC before fitting it in the case, though clearance is tight and you'll want to measure carefully. Or you can accept that for intensive workloads, this particular case isn't the right tool. The official Raspberry Pi documentation covers thermal management considerations in more detail if you want to dig into the specifics. For most typical Pi Zero use cases, though, this simply isn't a problem you'll encounter.
Storage Bay Options
Storage on the Pi Zero is handled entirely by the microSD card, and the case accommodates this with a cutout on the base that allows the card to be inserted and removed without opening the case. This is one of those small design details that makes a real difference in day-to-day use. If you need to swap your OS image, reflash the card, or just pull it out to read it on another machine, you don't have to disassemble anything. The card is accessible, the cutout is the right size, and the card clicks in and out of the Pi's slot without any obstruction from the case moulding.
There are no 2.5-inch or 3.5-inch drive bays, obviously. No M.2 slots, no SATA connections. The Pi Zero doesn't support any of that natively, so the case doesn't need to either. If you need external storage, you'd connect a USB drive via one of the micro USB ports using an OTG adapter, and the case doesn't interfere with that at all. The micro USB cutouts are sized to accommodate standard micro USB plugs without any issues.
One thing I will say: the microSD cutout is positioned correctly but the tolerances are tight enough that with some microSD cards that have slightly oversized bodies, you can feel a small amount of resistance when inserting or removing them. It's not a problem with standard cards from major brands. I tested with SanDisk and Samsung cards without any issues. But if you're using a no-name card with slightly non-standard dimensions, just be aware. It's a minor point, but worth mentioning.

Cable Management
Cable management in a case this size is essentially about port access rather than routing. There's no PSU shroud, no cable channels, no Velcro straps. What matters is whether the port cutouts are positioned and sized correctly so that your cables sit neatly and don't put stress on the board's connectors. On that front, the official case does well.
The two micro USB cutouts are on the same edge of the case, which mirrors the Pi Zero's actual port layout. One is for power, one is for data (OTG). Both cutouts are clean and properly sized. Standard micro USB cables seat fully and the connector doesn't wobble around in the cutout. The mini HDMI cutout is on the adjacent edge and again, properly sized. I had a micro USB power cable, a micro USB OTG adapter, and a mini HDMI cable all connected simultaneously during testing and there was no cable clash or awkward angles. The cables just... went where they needed to go. That sounds obvious but it's not always the case with third-party enclosures where the cutout positions don't quite match the actual port locations.
If you're building a permanent installation and want things to look tidy, the small footprint of the case actually helps. All your cables emerge from one or two edges of the case and can be routed cleanly along a surface or through cable clips. I had a Pi Zero W running as a home automation controller mounted behind a cabinet door, and the cable arrangement was clean enough that it looked intentional rather than cobbled together. That's partly down to the case design making it easy to route cables sensibly.
Airflow and Thermal Design
This is the section where the case's limitations are most apparent, and I want to be straight with you about it. The official Pi Zero Case is a fully enclosed ABS shell with no ventilation holes, no mesh panels, and no fan support. Airflow, in the traditional sense, doesn't exist. Heat generated by the SoC has to dissipate through the plastic shell via conduction and then into the surrounding air by convection. It's not a great thermal design, but for the original Pi Zero it doesn't matter much because the chip barely generates any heat.
The Pi Zero 2 W changes the equation. With its quad-core Cortex-A53 processor running at 1GHz, it generates meaningfully more heat than the single-core original. I ran a stress test on a Pi Zero 2 W inside this case and watched the temperature climb to around 70 degrees Celsius before the processor started throttling. That's not dangerous, but it does mean you're not getting full performance under sustained load. For typical use cases like running a media server, handling automation tasks, or acting as a network device, you're unlikely to hit sustained full CPU load and this won't be an issue. But if you're planning to do anything computationally intensive for extended periods, the thermal situation is worth thinking about.
The GPIO lid option does help slightly. Leaving the 40-pin header exposed creates a small opening that allows some convective airflow, and in my testing this knocked a few degrees off the peak temperature under load. It's not a dramatic improvement, but it's something. Adding a small adhesive heatsink to the SoC is probably the most effective thermal upgrade if you need it, and there's just about enough clearance under the blank lid to fit a very thin one. The GPIO lid gives you more headroom. For the vast majority of Pi Zero projects, though, the thermal situation is a non-issue. The Pi Zero platform was designed for low-power applications, and this case is matched to that design intent.
Front I/O and Connectivity
There's no front panel in the traditional sense. No USB 3.2 ports, no USB-C, no audio jacks, no power button with an RGB ring. The Pi Zero Case exposes the ports that are on the Pi Zero board itself, and that's it. Two micro USB ports and a mini HDMI output, plus the camera connector and microSD slot. That's your connectivity, and the case provides clean cutouts for all of them.
The lack of a dedicated power button is worth mentioning. The Pi Zero doesn't have a hardware power button at all. You power it by connecting the micro USB power cable and it boots automatically. To shut it down properly, you either use the software shutdown command or just pull the power (which isn't ideal for the filesystem but is what most people do). The case doesn't add or remove anything from this equation. If you want a proper power button, you'd need to wire one to the GPIO pins, which is a project in itself.
One thing I genuinely appreciate about the official case is that the port cutouts are labelled on the moulding. Tiny text, but it's there. PWR and USB are marked next to the respective micro USB cutouts. When you're working with a board this small and the ports are physically close together, that labelling saves you from plugging the power cable into the data port and wondering why nothing happens. It's a small thing but it shows the case was designed with actual users in mind rather than just being a generic shell.
Build Quality and Materials
The case is made from ABS plastic in the official Raspberry Pi red and white colour scheme. Build quality is good for the price point. The two halves of the case fit together precisely, the snap-fit mechanism is positive and secure, and there are no sharp edges anywhere on the moulding. I've handled third-party Pi Zero cases that had flash lines and mould seams sharp enough to be uncomfortable to handle. This one is clean throughout.
The lid options swap in and out easily. The blank lid, camera lid, and GPIO lid all use the same snap-fit mechanism and all three fitted and removed cleanly on my test unit. After several weeks of swapping lids during testing, the snap-fit still felt as positive as it did on day one. No loosening, no cracking. ABS plastic can become brittle if it's exposed to UV light over long periods, but for an indoor installation that's not going to be an issue.
The port cutouts deserve a specific mention because this is where cheap cases often fall down. Misaligned cutouts, cutouts that are slightly too small so you have to force connectors in, cutouts with rough edges that scrape the insulation off cables over time. None of that here. Every cutout I tested was correctly positioned and cleanly finished. The mini HDMI cutout in particular is well done, with enough clearance that standard mini HDMI plugs seat fully without any fuss. The overall impression is of a product that was properly engineered rather than just copied from a reference design. For a budget enclosure, that's genuinely impressive.
How It Compares
The Pi Zero case market is surprisingly crowded. You've got the official Raspberry Pi case, various third-party plastic cases from brands like Pimoroni and Flirc, and a huge range of 3D-printed options. The two most relevant comparisons for the official case are the Pimoroni Pibow Zero and generic aluminium cases that have become popular on Amazon.
The Pibow Zero is a layered acrylic design that looks fantastic and gives you full GPIO access without needing to swap lids. It's more expensive than the official case, and the layered construction means it's slightly bulkier. The aluminium cases offer better thermal performance because metal conducts heat away from the SoC much more effectively than ABS plastic, but they're typically more expensive and the port cutout quality varies wildly between manufacturers. The official case sits in an interesting position: it's the cheapest option, it has the best port cutout quality, and the three-lid system gives you flexibility that neither competitor matches out of the box.
Where the official case loses out is thermal performance compared to aluminium options, and aesthetics compared to the Pibow. If you're building something that needs to look good on a desk, the layered acrylic of the Pibow is more visually interesting. If you're running sustained workloads on a Zero 2 W, an aluminium case will keep temperatures lower. But for the majority of Pi Zero projects, the official case is the most practical choice.
| Feature | Official Pi Zero Case | Pimoroni Pibow Zero | Generic Aluminium Case |
|---|---|---|---|
| Material | ABS Plastic | Layered Acrylic | Aluminium |
| Lid Options | 3 included | Open top (GPIO access) | Usually 1 |
| Thermal Performance | Basic | Basic | Better |
| Port Cutout Quality | Excellent | Good | Variable |
| Assembly | Tool-free | Bolt together | Usually screws |
| Price Tier | Budget | Mid-range | Mid-range |
| Camera Support | Yes (dedicated lid) | Yes | Rarely |
| Official Product | Yes | No | No |
Final Verdict
The official Raspberry Pi Zero Case is exactly what it needs to be. It's a well-made, properly engineered enclosure that protects your Pi Zero board, provides clean access to all the ports, and gives you three lid options to suit different project requirements. At a budget price point, it's hard to argue with the value. The port cutout quality is better than most third-party alternatives I've handled, the snap-fit assembly is satisfying and durable, and the fact that it's the official product means it's been designed to fit the board precisely rather than being a generic approximation.
The thermal limitations are real, particularly for Pi Zero 2 W users running sustained workloads. If that's your use case, an aluminium case or a case with ventilation cutouts would serve you better. But for the vast majority of Pi Zero applications, those temperatures are never going to be a problem. A Pi-hole, a home automation controller, a retro gaming device, a network monitor. None of these push the processor hard enough to cause thermal throttling in normal use.
My verdict: buy it. It's the right case for most Pi Zero projects, it's competitively priced, and the three-lid system means you're not locked into a single configuration. The only reason to look elsewhere is if you specifically need better thermal performance or a particular aesthetic. For everything else, this is the sensible choice.
What works. What doesn’t.
5 + 3What we liked5 reasons
- Three lid options included (blank, camera, GPIO) for different project needs
- Excellent port cutout quality and alignment
- Tool-free snap-fit assembly that stays secure over time
- Official product designed to fit Pi Zero boards precisely
- Competitively priced for what you get
Where it falls3 reasons
- No ventilation means thermal throttling risk on Pi Zero 2 W under sustained load
- ABS plastic feels less premium than aluminium alternatives
- No mounting points or wall-mount options included
Full specifications
7 attributes| Form factor | Raspberry Pi Zero |
|---|---|
| CPU cooler clearance MM | 0 |
| Dimensions | 76 x 35 x 12mm |
| Fans included | 0 |
| GPU clearance MM | 0 |
| MAX FAN count | 0 |
| MAX radiator MM | 0 |
If this isn’t right for you
3 options 8.5 / 10
Fractal Design Era 2 ITX PC Case Review UK 2026
£176.29 · Fractal Design
 8.5 / 10
MSI MEG PROSPECT 700R Full Tower Gaming Computer Case 'Black, 4x 140mm ARGB Fans, 4.3'' Touch Panel, Vertical GPU Mount, USB Type-C, Tempered Glass, MSI Center, E-ATX, ATX, mATX, mini-ITX'
£289.62 · MSI
 8.5 / 10
MSI MAG PANO 110R PZ - Mid-tower Gaming PC Case - Supports up to 400 mm GPU in length, Removable Dust Filters, USB 20Gbps (Type-C), Back-connect ATX & Micro-ATX Motherboard support
£59.99 · MSI
Frequently asked
5 questions01Is the Raspberry Pi Zero Case good for airflow?+
Airflow is limited. The case is a fully enclosed ABS plastic shell with no ventilation holes or fan support. For the original Pi Zero running light tasks, this is fine as the chip barely generates heat. The Pi Zero 2 W can hit temperatures that cause thermal throttling under sustained load inside this case. The GPIO lid option helps slightly by leaving the 40-pin header area open, and adding a thin adhesive heatsink to the SoC before fitting the board can also help. For typical Pi Zero use cases, thermal performance is not a problem.
02What boards fit in the Raspberry Pi Zero Case?+
The case is designed for the Raspberry Pi Zero form factor, which measures 65mm x 30mm. It fits the original Pi Zero, the Pi Zero W, and the Pi Zero 2 W. It does not fit the Raspberry Pi 3, 4, or 5, which use a larger 85mm x 56mm board layout. There are separate official cases available for those models.
03Does the Raspberry Pi Zero Case support a camera module?+
Yes. The case includes a dedicated camera lid with a slot for the flat flex cable used by the Pi Zero camera module. The flex cable routes cleanly through the slot and the lid closes properly with the cable in place. The camera module itself sits at the correct angle for use. If you don't need camera access, the blank lid or GPIO lid can be used instead.
04Is the Raspberry Pi Zero Case easy to assemble?+
Very easy. The board clips into the base of the case using moulded plastic guides and the lid snaps on with a positive click. No tools or screws required. The lid can be swapped between the three included options (blank, camera, GPIO) without any tools. The snap-fit mechanism remained secure after repeated assembly and disassembly during testing over several weeks.
05What warranty and returns apply to the Raspberry Pi Zero Case UK?+
Amazon offers 30-day hassle-free returns if the case doesn't suit your needs. Raspberry Pi typically provides a warranty on manufacturing defects for their official accessories. Check the product listing for exact warranty terms at time of purchase.