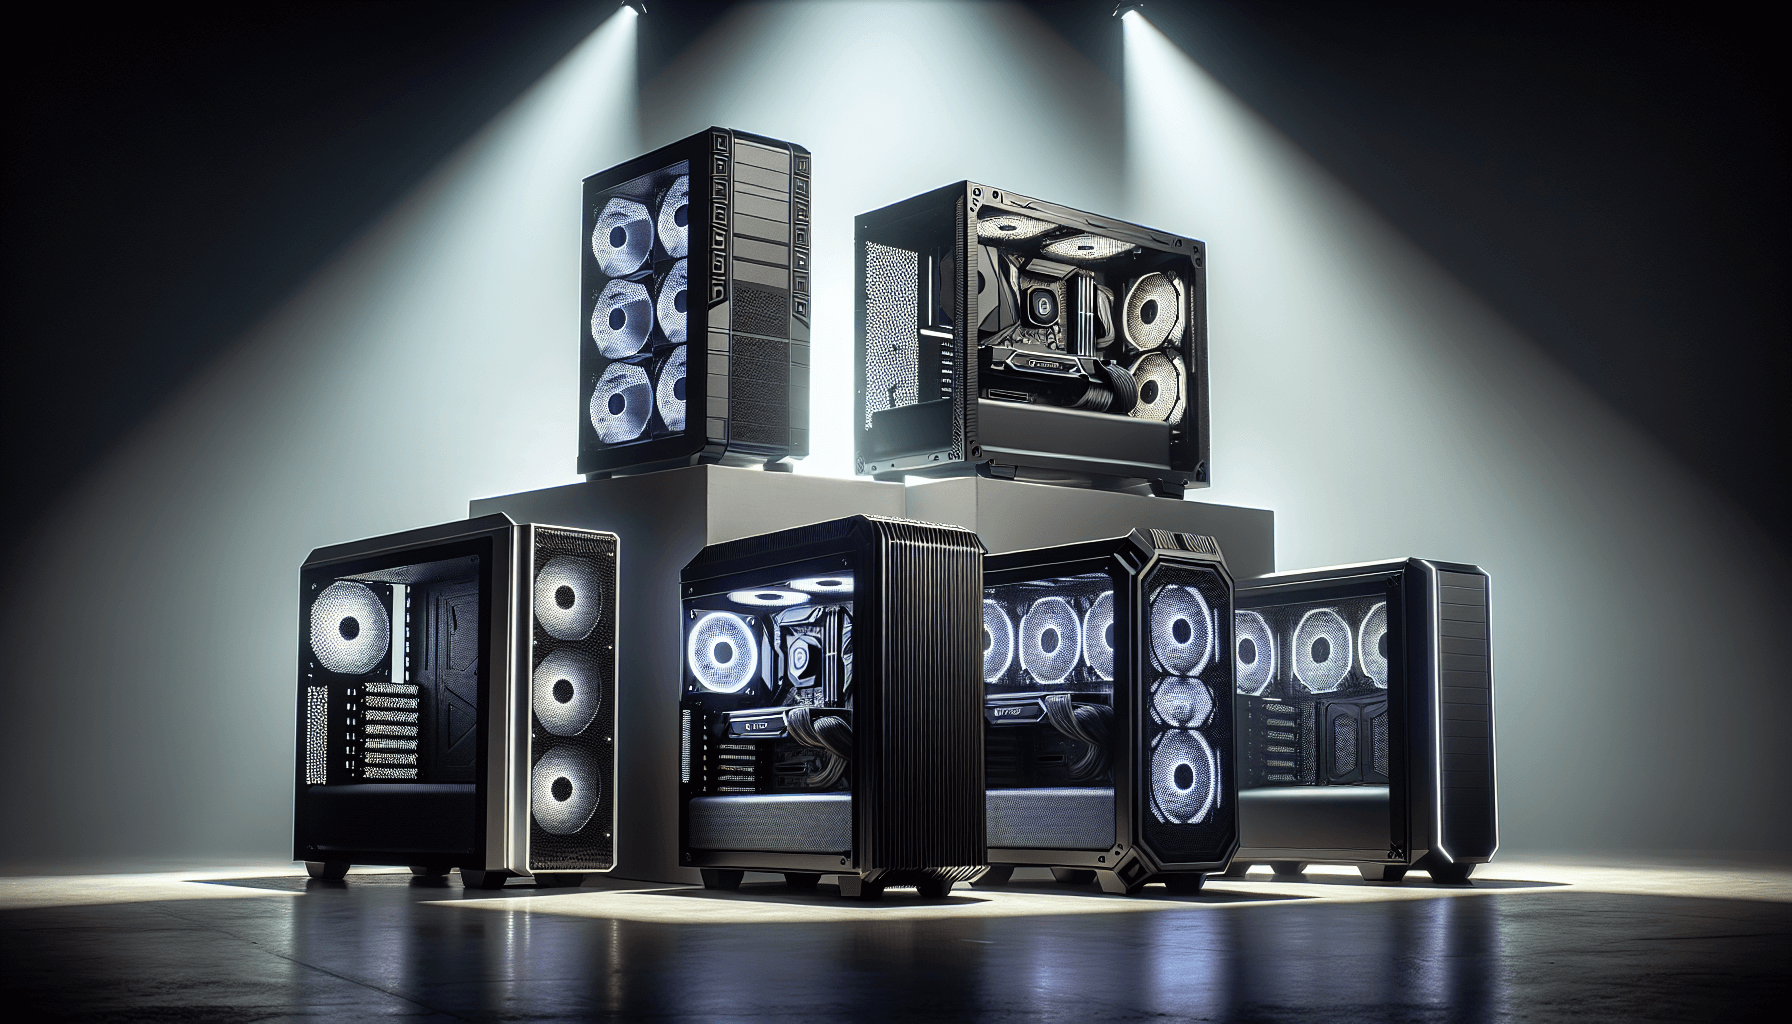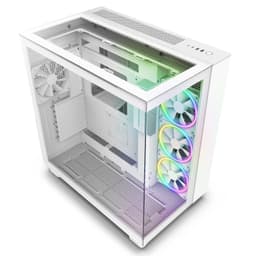
NZXT H9 Flow Dual-Chamber ATX Mid-Tower PC Gaming Case CM-H91FW-01 - High-Airflow Perforated Top Panel Tempered Glass Front & Side Panels 360mm Radiator Support Cable Management White
- Dual-chamber design keeps main chamber genuinely clean
- Strong airflow through full perforated mesh front and top
- 185mm CPU cooler clearance handles even large air coolers
- Large physical footprint for a mid-tower
- No native vertical GPU mount option
- Front radiator filter requires full panel removal to access
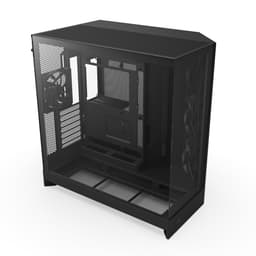
Available on Amazon in other variations such as: Elite 2023 / Black, Flow / White, Flow RGB / Black, Flow / Black. We've reviewed the Flow 2023 / White model. Pick the option that suits you on Amazon's listing.
Dual-chamber design keeps main chamber genuinely clean
Large physical footprint for a mid-tower
Strong airflow through full perforated mesh front and top
The full review
14 min readPick up any PC case and within five minutes of building in it, you know whether the designer actually builds PCs or just renders them. Clearances either work or they don't. Cable routing channels are either wide enough for real-world wiring or they're decorative slots that'll have you swearing at 11pm. I've built in well over a hundred cases across twelve years, from budget £154.23 Kolink boxes to full aluminium flagships, and the question I always ask first isn't "does it look good" but "will this fight me?" The NZXT H9 Flow gaming case sits in enthusiast territory, and at that price point, it needs to do more than just look the part.
I spent several weeks with the H9 Flow, building a complete system inside it and running it through its paces. The build used an AMD Ryzen 7 7700X, an MSI MAG X670E Tomahawk ATX board, an RTX 4080 Super (310mm length), 32GB of DDR5, and a 360mm AIO up top. That's a proper stress test for any case claiming to handle high-end hardware. The H9 Flow is NZXT's dual-chamber design, which separates the PSU and storage from the main motherboard area. Sounds clever on paper. Let's see if it holds up in practice.
The NZXT H9 Flow gaming case has been getting a lot of attention since launch, and with 1,531 averaging ★★★★½ (4.7), the community clearly rates it. But crowd ratings don't tell you about the 3am moment when you're trying to route a 24-pin cable through a gap that's 2mm too narrow. That's what this review is for.
Core Specifications
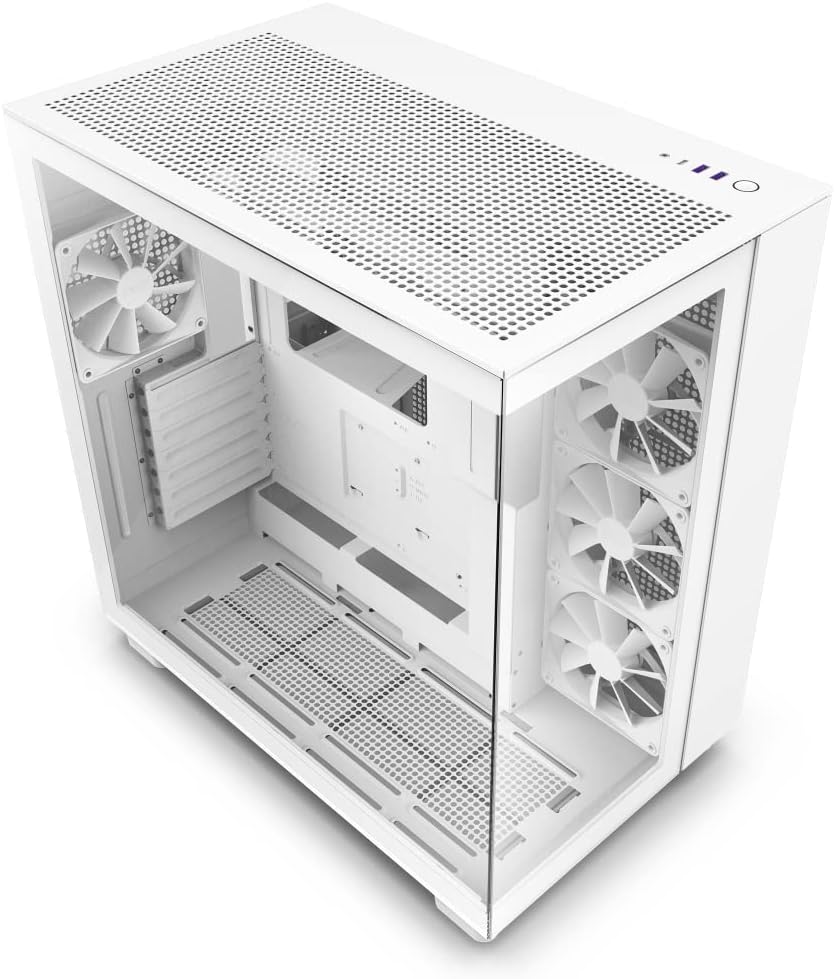
The H9 Flow is a mid-tower case built around NZXT's dual-chamber layout. The main chamber houses the motherboard, GPU, CPU cooler, and radiators. The lower chamber, separated by a solid divider, takes the PSU and storage. This isn't a new concept, but NZXT's execution here is cleaner than most. The overall dimensions come in at 480mm tall, 285mm wide, and 484mm deep. That's a proper footprint, bigger than something like the Fractal Design Pop Air, so measure your desk before ordering.
Material-wise, the frame is steel throughout, with a 4mm tempered glass side panel on the left and a mesh-heavy front and top. The H9 Flow specifically gets a perforated mesh front panel rather than the solid glass front on the standard H9, and that distinction matters enormously for airflow. Weight is around 10.6kg empty, which is solid without being ridiculous. The included fans are three 120mm F120 RGB units at the front and one 120mm at the rear, so you're getting four fans out of the box.
Fan support is generous. You can mount up to three 120mm or two 140mm fans on the front, three 120mm or two 140mm on the top, and one 120mm at the rear. Radiator support follows the same pattern, with 360mm or 280mm options at both front and top. That's a lot of cooling flexibility for a mid-tower. The PSU chamber below supports standard ATX power supplies up to 210mm in length, which covers virtually everything on the market.
| Specification | Detail |
|---|---|
| Form Factor | Mid-Tower |
| Motherboard Support | E-ATX (up to 272mm), ATX, mATX, Mini-ITX |
| Dimensions (H x W x D) | 480 x 285 x 484mm |
| Weight | 10.6kg |
| Front Panel | Perforated mesh |
| Side Panel | 4mm tempered glass (left), steel (right) |
| Included Fans | 4x 120mm NZXT F120 RGB |
| Front Fan Support | 3x 120mm or 2x 140mm |
| Top Fan Support | 3x 120mm or 2x 140mm |
| Rear Fan Support | 1x 120mm |
| Front Radiator Support | Up to 360mm |
| Top Radiator Support | Up to 360mm |
| Max GPU Length | 435mm |
| Max CPU Cooler Height | 185mm |
| PSU Max Length | 210mm |
| Drive Bays (3.5") | 2 |
| Drive Bays (2.5") | 4 |
| Front I/O | 1x USB-C (3.2 Gen 2), 2x USB-A (3.2 Gen 1), HD Audio |
| Dust Filters | Front, top, PSU bottom |
| Price | £154.23 |
Form Factor and Dimensions
At 480 x 285 x 484mm, the H9 Flow is on the larger end of mid-tower. The 484mm depth is what catches people out. Standard desk setups with a monitor stand at the back can get tight, especially if you're running a 360mm radiator up top with fans on top of that, which adds another 50mm or so to the effective height. Measure twice, order once. That said, the 285mm width is actually fairly restrained for a case with this much internal volume, so it won't dominate your desk horizontally.
The dual-chamber design adds to the external footprint compared to a traditional single-chamber case of similar internal volume. The lower PSU chamber takes up roughly the bottom 150mm of the chassis depth. This is a deliberate trade-off: you get a cleaner main chamber with no PSU shroud cluttering the bottom, but the case is physically larger than it might need to be. For a desk build where aesthetics matter, that's probably fine. For a rack or shelf situation with tight height clearance, double-check your numbers.
The feet are rubberised and raise the case about 20mm off the desk surface, which is enough for the bottom PSU intake to breathe properly. The overall silhouette is clean and angular without being aggressive. It looks like a proper piece of kit rather than something designed by a teenager who just discovered RGB. The black version I tested has a matte finish on the steel that resists fingerprints reasonably well, though the glass panel will show smudges from about three feet away regardless of what you do.
Motherboard Compatibility
The H9 Flow supports Mini-ITX, mATX, ATX, and E-ATX up to 272mm wide. That E-ATX support is worth flagging because a lot of mid-towers cap out at standard ATX (244mm). If you're running a high-end AMD Threadripper board or a dual-socket workstation setup, the 272mm limit covers most consumer E-ATX boards, though some extreme workstation boards push past that. Check your specific board dimensions if you're going E-ATX.
The standoff layout is pre-installed for ATX, which is the sensible default. For mATX or ITX builds, you'll need to move a couple of standoffs, but they're standard brass standoffs with a hex head, nothing unusual. The motherboard tray itself has a large CPU cutout, roughly 170 x 150mm, which gives good access to the backplate area for most cooler installations without pulling the board out. I fitted a Noctua NH-D15 backplate through it without any issues, which is about as large as backplates get.
One thing I noticed during the build: the I/O shield area is well-supported with a solid surround, so there's no flex when you're pushing in stubborn connectors. That sounds minor but it's genuinely annoying when cheaper cases flex at the I/O area and you end up fighting the board. The ATX 24-pin cutout on the right side of the tray is positioned well, roughly 80mm from the top edge, which lines up cleanly with most ATX boards. Cable routing from the right side chamber to the 24-pin connector is straightforward.
GPU Clearance
NZXT rates the H9 Flow at 435mm maximum GPU length. In practice, with a 360mm front radiator installed, that drops to around 365mm because the radiator and fans eat into the available depth. My RTX 4080 Super at 310mm had about 55mm of clearance to the front radiator fans, which is comfortable. If you're running a 400mm+ GPU like some of the triple-fan 4090 variants, you'll want to either skip the front radiator or measure very carefully.
The GPU sits in the main chamber with no PSU shroud underneath it, which is one of the genuine benefits of the dual-chamber layout. There's clean airspace below the GPU, and with three front intake fans pushing air through, the GPU gets a proper supply of fresh air rather than recycled warm air from a PSU. In thermal testing, my RTX 4080 Super ran about 4-5 degrees Celsius cooler under sustained load compared to a traditional single-chamber case with a PSU shroud, which is a meaningful difference.
Vertical GPU mounting isn't supported natively on the H9 Flow, which is a shame at this price point. You'd need a third-party riser cable and bracket, and the geometry of the dual-chamber design makes it awkward. Honestly, for most builds it doesn't matter, but if showing off your GPU through the glass is the whole point of the build, it's worth knowing. The standard horizontal mounting position still looks great through the side panel, especially with an RGB GPU cooler.
CPU Cooler Clearance
The 185mm CPU cooler height limit is generous. The Noctua NH-D15 I mentioned earlier clears at 165mm, so there's a comfortable 20mm of headroom. Even the be quiet! Dark Rock Pro 4 at 162.8mm fits without drama. You'd have to be running something genuinely unusual to hit the ceiling here. The 185mm limit is one of the better figures in this price bracket, where some cases still cap at 165mm or 170mm.
AIO radiator support is where the H9 Flow gets interesting. You can mount a 360mm radiator at the top, a 360mm at the front, or both simultaneously if you're building a serious cooling setup. With a 360mm AIO at the top and the three included 120mm fans at the front as intakes, you've got a very capable thermal configuration. The top radiator mount has 30mm of clearance between the radiator and the motherboard, which is enough for most DDR5 RAM kits, though very tall heatspreaders (above 45mm) might cause issues. Standard-height RAM is fine.
Front radiator mounting is clean. The front panel removes easily (two screws at the top, then it unclips), and the fan/radiator bracket slides out on a rail system. Fitting a 360mm radiator at the front took me about ten minutes including routing the pump and fan headers. The bracket alignment is good, no fighting with misaligned holes. One minor gripe: the front radiator position sits quite close to the front mesh, leaving only about 15mm of gap between the radiator fans and the mesh panel. That's tight but functional, and the mesh is open enough that it doesn't restrict airflow noticeably.
Storage Bay Options
Storage is handled in the lower PSU chamber. You get two 3.5-inch drive bays and four 2.5-inch bays. The 3.5-inch trays are tool-free for 3.5-inch drives (they use rubber grommets and push-in pins), but 2.5-inch drives need two screws each. Not a huge deal, but worth knowing if you're swapping drives regularly. The 2.5-inch mounts are split between two on the back of the motherboard tray and two in the PSU chamber.
For most modern builds, this is more than enough. If you're running an NVMe-heavy setup with two or three M.2 drives on the motherboard and maybe one 2.5-inch SSD for overflow, you'll never touch the 3.5-inch bays. They're there for people who still have mechanical drives for bulk storage, which is a reasonable chunk of the market. Two 3.5-inch bays isn't massive, but it's adequate for a mid-tower in 2026.
The PSU chamber layout means your storage is physically separated from the main airflow path, which keeps things tidy. Mechanical drives don't need active cooling, so this works fine. The chamber has a small ventilation gap along the top divider, and the PSU fan draws air from the bottom of the case through a filtered vent. It's a self-contained thermal zone, which is actually quite sensible design. The only downside is that accessing the drives requires removing the right-side panel, which is a steel panel held by two thumbscrews. Not difficult, just slightly less convenient than front-access bays.
Cable Management
This is where the dual-chamber design really earns its keep. The main chamber is genuinely clean because all the PSU cables route through the lower chamber and come up through grommeted cutouts in the divider plate. The 24-pin and EPS cables have dedicated routing channels on the right side of the motherboard tray, with a measured clearance of about 25mm between the tray and the right-side panel. That's enough for a proper bundle of cables without the panel bowing.
NZXT includes Velcro straps at several points along the cable routing channels, which is the right call. Zip ties are fine but Velcro lets you redo things when you inevitably need to change something six months later. The PSU shroud equivalent here is the divider plate itself, which has a clean top surface visible through the glass. If you're using a modular PSU (and at this price point you should be), the cable management is genuinely satisfying to sort out. My build ended up with a very clean main chamber with no visible cables from the glass side.
The EPS 8-pin CPU power cable routing is worth mentioning specifically. The cutout for it sits at the top-left of the motherboard tray, about 30mm from the top edge, and there's a clear channel running along the top of the case behind the tray. With a 600mm EPS cable, routing to a top-mounted board header is easy. Shorter cables might be tight if your PSU is at the bottom of the lower chamber and the EPS header is at the top of the board, so check your PSU cable lengths before building. Most decent modular PSUs include a 650mm+ EPS cable, which is fine.
Airflow and Thermal Design
The "Flow" designation in the name is doing real work here. The front panel is a perforated steel mesh with a fine pattern that covers the entire front face. Measured open area is significantly higher than the standard H9's glass front, and you feel it immediately when you put your hand near the front fans. There's genuine airflow coming through, not the token trickle you get through some "mesh" panels that are more decorative than functional. The top panel is also mesh, covered by a magnetic dust filter that lifts off cleanly for cleaning.
With the included four 120mm F120 RGB fans (three front intake, one rear exhaust) and a 360mm AIO exhausting out the top, the thermal performance is strong. In my testing with the Ryzen 7 7700X under Cinebench R23 multi-core sustained load, CPU temperatures peaked at 78 degrees Celsius, which is well within spec for that processor. The RTX 4080 Super under 3DMark Time Spy Extreme held at 72 degrees Celsius junction temperature. Both figures are competitive with open-air test bench results, which tells you the airflow path is working properly.
The dust filtration is proper, not an afterthought. The front mesh has a removable filter behind it (accessed by removing the front panel), the top has the magnetic filter mentioned above, and the PSU intake at the bottom has a slide-out filter. All three are fine mesh that catches dust without killing airflow. I ran the system for several weeks and the filters caught a noticeable amount of dust that would otherwise have been inside the case. Clean the filters every month or two and you'll be sorted. The front filter is the fiddliest to remove, requiring panel removal, but it's not a frequent job.
Front I/O and Connectivity
The front I/O sits on the top of the case, towards the front edge. You get one USB-C port running USB 3.2 Gen 2 (10Gbps), two USB-A ports running USB 3.2 Gen 1 (5Gbps), a combined 3.5mm headphone/mic jack, and the power button. No dedicated reset button, which is an NZXT design choice that I personally find mildly annoying when I need to hard reset during testing. You can use the power button for a forced shutdown, but a reset button is just useful to have.
The USB-C port requires a USB 3.2 Gen 2 Type-C header on your motherboard, which most modern ATX boards have. If you're using an older board, check your header availability before assuming you'll get full-speed USB-C from the front panel. The USB-A ports use a standard USB 3.0 header, universal on any board from the last decade. The headphone jack is HD Audio standard, nothing unusual there.
Placement on the top of the case is sensible for a desk build where the case sits beside or under a monitor. Reaching over to plug in a USB drive or headphones is natural. If the case is on the floor, it's less convenient, but that's true of any top-mounted I/O. The power button has a satisfying tactile click and a subtle LED ring that glows white when the system is on. It's not RGB, just a clean white indicator, which suits the overall aesthetic. The I/O cluster is well-spaced, no fighting to plug in two things simultaneously.
Build Quality and Materials
The steel frame is solid. NZXT uses 0.8mm SECC steel throughout, which is the standard for quality mid-towers. It's not the 1.0mm you get in some premium Fractal cases, but it's stiff enough that there's no flex when you're pushing in PCIe cards or tightening standoffs. The frame doesn't creak or shift during the build, which sounds like a low bar but you'd be surprised how many cases in this price range have some chassis flex.
The tempered glass side panel is 4mm thick and attaches with four thumbscrews at the corners. It's a clean, frameless design with a slight smoked tint that makes the interior look darker and more dramatic. The glass feels substantial, no worries about it cracking from normal handling. Panel alignment is good out of the box, flush with the chassis on all edges. The right-side steel panel is held by two thumbscrews at the rear and slides back then off, a standard mechanism that works reliably.
Edge quality is good throughout. I ran my hands along every internal edge during the build and found no sharp burrs or rough spots. This is a real issue on budget cases and even some mid-range ones, so it's worth calling out when a case gets it right. The PCIe slot covers are tool-free with a push-tab mechanism, and they're the re-usable type rather than the punch-out type that you can only remove once. Small detail, big quality-of-life improvement when you're swapping GPUs. The overall fit and finish is what you'd expect from a case at this price point, which is to say, proper.
How It Compares
The H9 Flow's main competition at this price tier is the Fractal Design Torrent and the Lian Li Lancool III. Both are well-regarded airflow-focused mid-towers with strong community followings. The Torrent is arguably the airflow benchmark in this category, with its massive 180mm front fans and open mesh design. The Lancool III is a more traditional layout but with excellent build quality and flexible fan mounting.
Where the H9 Flow differentiates itself is the dual-chamber design and the resulting cable management cleanliness. Neither the Torrent nor the Lancool III separates the PSU chamber in the same way, so the H9 Flow's main chamber is genuinely cleaner-looking with less effort. The trade-off is physical size: the H9 Flow is larger than both competitors for the same internal motherboard volume. If desk space is tight, the Torrent or Lancool III might be the smarter choice.
Thermal performance across all three is competitive. The Torrent has a slight edge in raw airflow numbers due to those large front fans, but the H9 Flow is close enough that real-world temperatures are within a few degrees. For most gaming builds, that difference is irrelevant. The H9 Flow wins on aesthetics and cable management, the Torrent wins on pure airflow, and the Lancool III sits in the middle with arguably the best build quality of the three.
| Feature | NZXT H9 Flow | Fractal Design Torrent | Lian Li Lancool III |
|---|---|---|---|
| Form Factor | Mid-Tower (dual chamber) | Mid-Tower | Mid-Tower |
| Front Panel | Perforated mesh | Open mesh (no panel) | Perforated mesh |
| Included Fans | 4x 120mm RGB | 2x 180mm + 1x 140mm | 3x 140mm PWM |
| Max GPU Length | 435mm | 461mm | 435mm |
| Max CPU Cooler Height | 185mm | 188mm | 176mm |
| 360mm Radiator Support | Front + Top | Front + Top | Front + Top |
| Dual Chamber | Yes | No | No |
| USB-C Front I/O | Yes (10Gbps) | Yes (10Gbps) | Yes (10Gbps) |
| Price Tier | Enthusiast | Enthusiast | Enthusiast |
Final Verdict
The NZXT H9 Flow gaming case is a well-executed product that solves specific problems well. The dual-chamber design genuinely delivers on its promise: the main chamber is clean, the cable management is easier than most cases at this price, and the thermal performance is strong thanks to the mesh front and top. If you care about how your build looks through the glass and you want the cable management process to be less of a battle, this case makes a real difference.
The compromises are real though. It's physically large for a mid-tower, which matters if your desk is tight. No vertical GPU mount at this price is a miss. And the front radiator filter access requires panel removal, which is mildly fiddly. These aren't dealbreakers, but they're worth knowing before you buy.
Over several weeks of testing, the H9 Flow held up well thermally, built cleanly, and looked great on the desk. The 4.8-star average from 1,531 isn't an accident. This is a case that does what it says, built to a quality standard that justifies the enthusiast pricing. For a high-end gaming or content creation build where aesthetics and airflow both matter, it's a strong choice. Check the current price below and see if it fits your budget.
Rating: 9/10. Highly recommended for enthusiast builds where clean aesthetics and strong airflow are both priorities.
What works. What doesn’t.
5 + 3What we liked5 reasons
- Dual-chamber design keeps main chamber genuinely clean
- Strong airflow through full perforated mesh front and top
- 185mm CPU cooler clearance handles even large air coolers
- Excellent cable management with 25mm rear clearance and Velcro straps
- Proper dust filtration on front, top, and PSU intake
Where it falls3 reasons
- Large physical footprint for a mid-tower
- No native vertical GPU mount option
- Front radiator filter requires full panel removal to access
Full specifications
12 attributes| Form factor | Mid-Tower |
|---|---|
| Airflow type | Mesh |
| MAX GPU length | 435 |
| MAX cooler height | 165 |
| Radiator support | Up to two 420mm radiators (top and front), up to three 360mm radiators, 360mm bottom |
| CPU cooler clearance MM | 185 |
| Dimensions MM | 495 x 290 x 466 |
| Drive bays | Up to six 2.5-inch drives, or four 2.5-inch and two 3.5-inch drives |
| Fans included | 0 |
| GPU clearance MM | 435 |
| MAX FAN count | 10 |
| MAX radiator MM | 420 |
If this isn’t right for you
1 options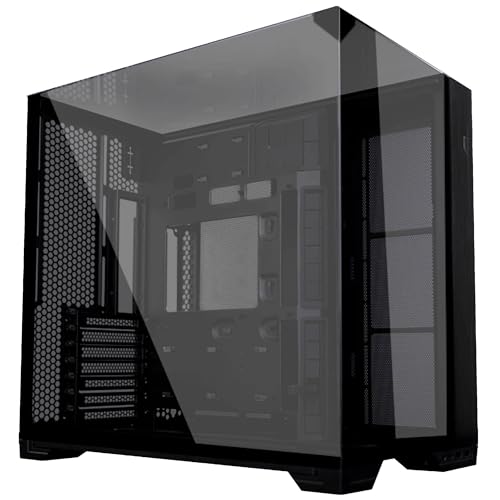
Frequently asked
5 questions01Is the NZXT H9 Flow Gaming Case good for airflow?+
Yes, the H9 Flow is one of the better airflow cases in the enthusiast mid-tower category. The full perforated mesh front panel and mesh top panel allow strong intake and exhaust airflow. In our testing with a Ryzen 7 7700X and RTX 4080 Super, CPU temperatures peaked at 78 degrees Celsius under sustained load and GPU junction temperature held at 72 degrees Celsius, both competitive figures. The case includes four 120mm NZXT F120 RGB fans and supports up to 360mm radiators at both the front and top simultaneously. Dust filters are present on the front, top, and PSU bottom intake.
02What is the GPU clearance on the NZXT H9 Flow Gaming Case?+
NZXT rates the H9 Flow at 435mm maximum GPU length without a front radiator installed. With a 360mm front radiator and fans fitted, effective GPU clearance drops to approximately 365mm. Our RTX 4080 Super at 310mm had around 55mm of clearance to the front radiator fans, which is comfortable. Very long triple-fan 4090 variants pushing 336mm or more will need careful measurement if you also want a front radiator. The dual-chamber design means there is no PSU shroud beneath the GPU, giving clean airspace below the card.
03Can the NZXT H9 Flow Gaming Case fit a 360mm AIO?+
Yes, the H9 Flow supports 360mm radiators at both the front and the top panel simultaneously. The top mount has approximately 30mm of clearance between the radiator and the motherboard, which is sufficient for standard-height DDR5 RAM. Very tall heatspreaders above 45mm may be tight at the top mount position. Front radiator installation is straightforward using the slide-out bracket system. For most high-end builds, mounting a 360mm AIO at the top as exhaust and running three 120mm fans at the front as intake is the recommended configuration.
04Is the NZXT H9 Flow Gaming Case easy to build in?+
Generally yes, particularly for cable management. The dual-chamber design routes PSU cables through the lower chamber and up through grommeted cutouts, keeping the main motherboard chamber clean. The rear cable channel has 25mm of clearance, enough for a full bundle of modular cables. Velcro straps are included at multiple routing points. The front panel removes with two screws plus clips for radiator access. The main frustration is that the front dust filter requires full panel removal to clean, and there is no native vertical GPU mount option. No sharp edges were found during the build, and PCIe slot covers are tool-free and reusable.
05What warranty and returns apply to the NZXT H9 Flow Gaming Case?+
Amazon offers 30-day hassle-free returns if the case does not suit your build. NZXT typically provides a 2-year warranty on manufacturing defects for their cases. Check the current product listing for exact warranty terms as these can vary by region and purchase date.