
VR-PC-BUILDING Decision guide
First-Time Gaming PC Build Mistakes (And How to Avoid Them)
The common first time PC build mistakes UK builders make, from standoffs to dual-channel RAM, and exactly how to avoid each one before your first boot.
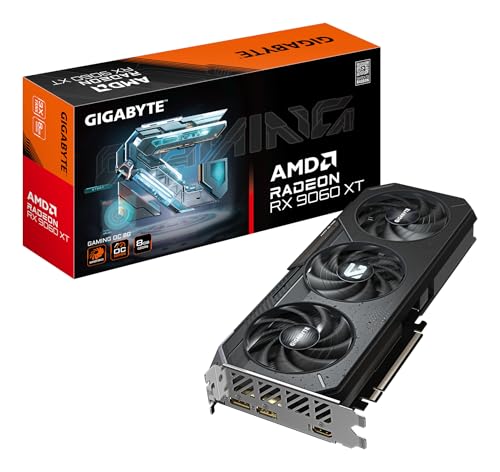 Top pick: Gigabyte Gigabyte Radeon RX 9060 XT GAMING OC 8G Graphics Card - 8GB GDDR6, 128bit, PCI-E 5.0, 3320 MHz Core Clock, 2 x DisplayPort, 1 x HDMI, GV-R9060XTGAMING OC-8GD
Building your first gaming PC is genuinely brilliant. It's also where almost everyone trips over the same handful of mistakes, usually at about 11pm, usually with one screw left over and no idea where it came from. Good news? Every one of these is easy to avoid once you know it's coming.
This is a tour of the classic first-build gotchas, grouped by when they tend to bite: planning, assembly, and that nervous first boot. Read it before you start and you'll skip the most common reasons a fresh build refuses to play nicely. If you want the full step-by-step alongside it, our guide to building a gaming PC walks the whole process from box to desktop, and the gaming hub has the deeper component breakdowns.
Planning mistakes that cost you before you've opened a box
The expensive mistakes happen on the spreadsheet, not the workbench. Get these right and the build itself is mostly common sense.
Buying a power supply that's too small. This is the big one. People budget hard for the graphics card, then grab the cheapest PSU on the shelf and wonder why the system crashes under load or won't boot at all. Modern graphics cards can pull serious power in spikes, and an undersized or low-quality unit simply can't keep up. Work out your total draw, add comfortable headroom, and don't skimp on the one component that feeds everything else. Our power supply guide covers sizing and why wattage isn't the only number that matters.
Forgetting the cost of an operating system. Windows isn't free, and a surprising number of first-timers finish the build, switch on, and realise they've nothing to actually run on it. Budget for a licence (or a Linux plan) from the start, and have a bootable USB ready before you begin. Nobody enjoys driving to fetch a USB stick mid-build.
Not checking whether the board needs a BIOS update for your CPU. This catches people pairing a newer chip with an older-generation motherboard. The board may need a firmware update before it'll even recognise the processor, and some can't update without a CPU already installed, which is a proper chicken-and-egg headache. Check the motherboard's supported CPU list and BIOS version before you buy. Many recent boards have a button on the back that lets you flash the firmware with no CPU fitted, so look for that feature if you're mixing generations.
Case and airflow mistakes
The case isn't just a metal box. It decides whether your shiny new parts run cool or quietly cook themselves.
Ignoring airflow direction. Fans have a front and a back, and they only move air one way. The usual setup pulls cool air in at the front and bottom, and pushes warm air out at the rear and top. Mount a fan backwards and you'll fight your own cooling all day. Look for the little arrows on the fan frame: one shows airflow direction, the other shows blade spin. Our case buying guide goes into airflow, clearance, and the measurements worth checking before you commit.
Not checking clearance before you buy. Graphics cards keep getting longer and chunkier, and big air coolers are tall. Measure twice. A card that won't fit, or a cooler that fouls the side panel, turns a fun evening into a returns query.
Assembly mistakes (the workbench gremlins)
Most build problems live here, and almost all of them come down to one thing: not reading the manual, and not pushing things in quite hard enough.
The motherboard standoffs. Standoffs are the little brass pillars that lift the motherboard off the case tray so its underside doesn't short against bare metal. Forget to fit them and the board grounds out and won't boot. Fit one too many, in a spot with no matching screw hole, and that stray standoff can short the board just as badly. Count the mounting holes on your motherboard, fit exactly that many standoffs in the matching positions, no more.
RAM in the wrong slots. Two sticks of memory want to run in dual channel for the best performance, and that means specific slots, usually the second and fourth, not the two next to each other. The motherboard manual spells it out with a little diagram. Put them in the wrong pair and the PC may still work, just slower. While you're there, push the sticks down firmly until both retention clips snap shut with an audible click. Half-seated RAM is one of the top reasons a build won't display anything. More on layouts and speeds in our memory guide.
Not seating the graphics card fully. Same story as RAM, just bigger. The card needs to drop fully into the PCIe slot until the locking tab clicks. It can look seated when it isn't, especially with a heavy card sagging at the far end. Press firmly and evenly along the top edge until you hear and feel it lock. A graphics card that isn't fully home gives you a dead screen and a sinking feeling. Our graphics card guide covers fitting and what to check.
The front-panel header jumble. Ah, the worst part of any build. Those tiny individual wires from the case (power switch, reset switch, power LED, drive activity LED) plug into a cramped block of pins on the motherboard, and they're labelled in print you'll need good light to read. Get the power switch pair wrong and the machine simply won't turn on. The LEDs are polarised too, so a backwards LED just stays dark. Take your time, use the manual's pin diagram, and a torch helps more than you'd think.
Forgetting the separate CPU power cable. The big 24-pin cable is obvious. The 8-pin (sometimes 4-plus-4-pin) EPS cable that powers the processor, tucked up near the top of the board, is the one people miss. Without it the system either won't post or shuts straight down. It's a separate cable from the PSU, not part of the main loom, so check it's in before you close the case.
Leaving protective film and plastic caps in place. Coolers often ship with a thin film over the contact base, or a plastic cap protecting it. Both must come off before fitting, or the cooler can't transfer heat and temperatures rocket. Same goes for the peel-off film on case glass and any covers over connectors. If something looks like it's protecting a surface, it probably needs to go.
Static discharge carelessness. You don't need a lab coat, but a little caution pays. Build on a hard surface rather than a carpet, keep one hand on the bare metal of the case to stay grounded, and touch the case before you pick up any component. An anti-static strap costs very little and removes the worry entirely. Static damage is rare, but it's invisible and there's no undoing it.
Over-tightening screws. These threads are mostly going into soft metal or plastic standoffs, and they need firm, not Herculean. Snug them up until they stop, then leave them. Cranking down on a motherboard screw can crack the board or strip the standoff, and there's no real upside to white-knuckling it.
Cable management (do it as you go, not at the end)
Tidy cables aren't just for the photos. Left until the last minute, a tangle of cabling ends up draped across a fan or stuffed against an intake, choking the airflow you carefully planned. Route cables behind the motherboard tray as you connect them, use the case's tie-down points, and keep the main chamber clear so air can actually move. Half an hour of routing during the build saves an hour of unpicking later, and your temperatures will thank you.
First-boot mistakes (you're nearly there)
It powered on, you've got a desktop, the temptation is to jump straight into a game. One more checklist first.
Plugging the monitor into the motherboard instead of the graphics card. This deserves its own heading because so many first-timers hit it. If you have a dedicated graphics card, your monitor cable goes into the ports on the card, lower down on the back of the case, not the motherboard's display outputs higher up. Use the wrong ones and you'll get a blank screen or weak performance, then assume something's broken when it's just a cable in the wrong hole.
Not stress-testing or checking temperatures. A PC can boot to the desktop and still have a cooler that isn't seated properly or a fan curve that's far too lazy. Before you trust it, run a short stress test on the CPU and a graphics benchmark, and watch the temperatures while they run. If something climbs alarmingly, you've caught a cooling problem early, on your terms, rather than mid-game three weeks from now. While you're in the BIOS, switch on the XMP or EXPO memory profile so your RAM actually runs at the speed you paid for.
A quick pre-flight checklist
Before you press the button for the first time, run through this:
- Standoffs fitted to match every motherboard hole, none extra.
- RAM in the correct slots for dual channel, clicked fully in.
- Graphics card seated until the slot tab locks.
- Both the 24-pin and the separate CPU (EPS) power cables connected.
- Front-panel wires matched to the manual's pin diagram.
- Cooler film and plastic cap removed.
- Protective films peeled off glass and surfaces.
- Monitor plugged into the graphics card, not the motherboard.
- Cables routed clear of fans and intakes.
None of these mistakes makes you a bad builder. Every single one has caught thousands of people before you, and the only real difference between a smooth first build and a frustrating one is knowing what to look for. Take it slow, read the manuals, and enjoy it. When that desktop appears for the first time, you'll understand exactly why people get hooked. Ready to start? The full step-by-step build guide takes it from here.
Read our reviews for each part
Every component in this build, with the models we've tested and rated.
Gigabyte Gigabyte Radeon RX 9060 XT GAMING OC 8G Graphics Card - 8GB GDDR6, 128bit, PCI-E 5.0, 3320 MHz Core Clock, 2 x DisplayPort, 1 x HDMI, GV-R9060XTGAMING OC-8GD
Our other picks for this guide are temporarily out of stock. This is the one we'd still buy today.
Gigabyte
Gigabyte Radeon RX 9060 XT GAMING OC 8G Graphics Card - 8GB GDDR6, 128bit, PCI-E 5.0, 3320 MHz Core Clock, 2 x DisplayPort, 1 x HDMI, GV-R9060XTGAMING OC-8GD
Common questions
Frequently Asked Questions
Nine times out of ten it's the front-panel header. The tiny power switch wires on your case plug into a fiddly block of pins on the motherboard, and they're easy to put on the wrong way or in the wrong place. Check the motherboard manual for the exact layout. After that, make sure the CPU power cable (the 8-pin EPS connector near the top of the board) is plugged in, not just the big 24-pin one. A dead PSU switch on the back of the case catches a few people too.
Almost always because the monitor cable is plugged into the wrong place. If you've got a separate graphics card, the monitor must connect to the ports on the card itself (lower down on the back of the case), not the ones built into the motherboard. Swap the cable to the graphics card's HDMI or DisplayPort and you'll usually get a picture. If that fails, reseat the graphics card and the RAM, since a stick that isn't fully clicked in can stop the system displaying anything.
Two reasons, usually. First, you may have put the sticks in the wrong slots, so the system isn't running in dual channel. The manual tells you which two slots to use, often slots two and four. Second, memory runs at a slow default speed until you switch on the XMP or EXPO profile in the BIOS, which is the saved setting that unlocks its rated speed. Enable that, save, and reboot. Both fixes are free and take seconds.
A strap is the safest option and they cost very little, so it's a sensible buy for a first build. If you don't have one, you can still work safely: build on a hard surface rather than carpet, keep a hand on the bare metal case to stay grounded, and touch the case before handling any component. Static damage is rare but it's also invisible and permanent, so a few seconds of care is cheap insurance.
Start with the obvious culprits. Did you peel the protective film off the cooler's base, and remove the plastic cap that some coolers ship with? Both block heat transfer completely. Next, check the cooler is screwed down evenly and that you used a sensible amount of thermal paste. Then look at airflow: fans should pull cool air in at the front and push warm air out at the back and top. If a CPU cable or a tangle of cables is sitting across a fan, tidy it. Run a stress test and watch the temperatures to confirm the fix.
We're an Amazon Associate. If you click a product link and buy something, we earn a small commission at no extra cost to you. We only recommend products we'd use ourselves.
Top pickGigabyte Radeon RX 9060 XT GAMING OC 8G Graphics Card - 8GB GDDR6, 128bit, PCI-E 5.0, 3320 MHz Core Clock, 2 x DisplayPort, 1 x HDMI, GV-R9060XTGAMING OC-8GD£398.99Add to cart →