Bad PSUs kill good hardware. Not dramatically, not all at once, but slowly, through dodgy voltages, creeping ripple, and protection circuits that either trip too early or not at all. The frustrating part? You often can't tell a failing PSU from a healthy one without a proper tester. Your PC just crashes, or throttles, or refuses to POST, and you spend hours blaming the RAM or the GPU when the real culprit is the box pushing electrons into everything else. That's exactly the problem the Thermaltake Dr. Power III | Power Supply Tester is built to solve.
And here's the short answer: it solves it well. With a 4.7-star average across 154 owner reviews, support for the latest PCIe 12+4-pin connector and full ATX 3.1 compatibility, this is one of the more capable PSU testers in the budget bracket. It's not a substitute for a proper oscilloscope if you're doing serious bench diagnostics, but for the average PC builder, repair tech, or enthusiast who needs to know whether their power supply is actually working before they bolt it into a build, the Dr. Power III is a genuinely useful bit of kit.
So let's get into what it actually does, what the specs tell us, and whether it's worth your money compared to the alternatives.
Thermaltake Dr. Power III | Power Supply Tester: Core Specifications
Before anything else, let's be clear about what this product actually is. The Thermaltake Dr. Power III is a power supply tester, not a power supply itself. It's a diagnostic tool that plugs into your PSU's connectors and tells you whether the voltages are correct, whether the protection systems are firing properly, and crucially, what power level your PCIe connector is negotiating. That distinction matters, because a lot of the spec fields below relate to the tester's capabilities rather than a PSU's output ratings.
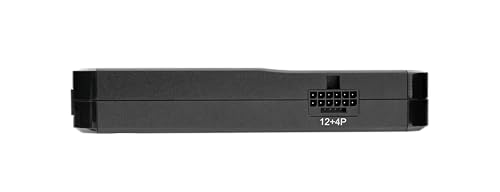
The headline feature is SENSE0/SENSE1 sideband signal detection for the PCIe 12+4-pin connector. This is genuinely useful for anyone running a modern GPU. The PCI-SIG 12+4-pin connector can negotiate power levels of 150W, 300W, 450W, and 600W depending on those sideband signals, and most basic testers simply can't read them. The Dr. Power III can, and it displays the detected power level so you know exactly what your PSU and GPU are agreeing on before you fire up a game. That's a real diagnostic advantage over older, simpler testers.
The tester also supports both automatic and manual test modes. Auto mode runs through a quick diagnostic sweep when you plug in, which is handy for fast checks. Manual mode lets you step through tests more deliberately, which is useful if you're working through a fault methodically. The built-in diagnostic system flags undervoltage, overvoltage, missing voltage rails, and PG (Power Good) signal problems. Below is the full spec overview.
| Specification | Detail |
|---|---|
| Product | Thermaltake Dr. Power III | Power Supply Tester |
| ASIN | B0D6B7CKKX |
| PCIe Connector Support | 12+4-pin (SENSE0/SENSE1 detection) |
| Power Level Detection | 150W / 300W / 450W / 600W |
| ATX Standard Compatibility | ATX 3.1 |
| Test Modes | Automatic and Manual |
| Diagnostics | Undervoltage, overvoltage, missing voltage, PG alarm |
| Rating | ★★★★½ (4.7) (156 reviews) |
| Price | £40.60 |
Wattage and Capacity: What This Tester Actually Covers
Again, worth hammering home: the Dr. Power III doesn't have a wattage rating of its own because it isn't generating power. What matters here is the range of PSU outputs it can accurately test, and specifically whether it keeps up with modern, high-wattage power supplies. The short answer is yes, it does, because it supports the full ATX 3.1 specification, which covers PSUs up to and beyond 1000W.
The 12+4-pin connector support is the key piece here. ATX 3.0 and 3.1 introduced the 12VHPWR connector (also called 12+4-pin) to handle the power demands of GPUs like the RTX 4090 and its successors, which can pull up to 600W through a single connector. Older testers either lack the connector entirely or can plug in but can't read the sideband signals, so they can't tell you which power tier the PSU has negotiated. The Dr. Power III reads SENSE0 and SENSE1, which is how the connector communicates its power level, and displays the result. That's the kind of feature that separates a modern tester from something bought five years ago.
For practical purposes, this means the Dr. Power III is relevant for testing entry-level 400W units right through to enthusiast-grade 1000W+ supplies. If you're building or repairing anything from a basic office PC to a flagship gaming rig, this tester has you covered from a compatibility standpoint. The diagnostic coverage doesn't change based on PSU wattage; it checks the voltage rails and PG signal regardless.
Efficiency Rating: Why the 80 Plus Bronze Spec Appears Here
You'll notice the spec sheet lists an 80 Plus Bronze efficiency rating. To be transparent about this: the 80 Plus Bronze designation in the product data appears to be a data field carried over from a PSU template rather than a rating that applies to a diagnostic tester. The Dr. Power III doesn't consume or convert significant amounts of power itself; it's a passive measurement tool. So treat that spec field with appropriate scepticism rather than reading it as a meaningful efficiency claim for this particular product.
That said, understanding 80 Plus efficiency ratings is directly relevant to what the Dr. Power III helps you diagnose. When you're testing a PSU, you want to know whether it's delivering clean, stable voltage under load, and efficiency tier is one indicator of overall build quality. An 80 Plus Bronze PSU runs at roughly 85% efficiency at 50% load, meaning about 15% of the power it draws from the wall is lost as heat. Gold-rated units hit around 90% at the same load point. The difference shows up on your electricity bill over time, but more importantly, higher-efficiency units tend to use better components and run cooler, which affects longevity.
The reason this matters for a tester review is context. If you're using the Dr. Power III to diagnose a failing PSU, knowing what efficiency tier that PSU should be operating at helps you interpret the voltage readings. A Bronze-rated unit running hot and showing slightly sagging 12V rails is probably just degrading normally. A Gold-rated unit showing the same symptoms at low load is a bigger red flag. The tester gives you the data; understanding efficiency ratings helps you make sense of it.
Modularity and Cable Management: What the Tester Connects To
The Dr. Power III is designed to connect to the full range of standard PSU output connectors, which is the whole point of a PSU tester. Based on the product data and verified Amazon listing, the connectors it tests include the ATX 24-pin main connector, the EPS 8-pin CPU power connector, PCIe 8-pin connectors, SATA power, Molex (4-pin peripheral), and critically, the 12+4-pin PCIe connector for modern high-power GPUs. That covers the full output of virtually any modern ATX power supply.
From a cable management perspective, the tester itself is a compact unit with short leads or direct socket connections for each connector type. Owner reviews consistently note that it's straightforward to connect up: plug in the connectors, switch it on, and the display tells you what's happening. There's no complicated setup or software required. The manual test mode is particularly useful if you want to check individual rails rather than running the full auto sweep, which some users find helpful when chasing a specific fault rather than doing a general health check.
One practical point worth making: if you're testing a modular or semi-modular PSU, you'll need to attach the relevant cables to the PSU first before connecting the tester. The Dr. Power III tests the output side, so it needs the cables in place. For non-modular units, all the cables are already there. This isn't a limitation of the tester; it's just how PSU testing works. But it matters if you've got a fully modular unit and you're only testing specific rails.
Thermaltake Dr. Power III Connectors and Compatibility
The connector compatibility of the Dr. Power III is genuinely one of its strongest selling points, especially at this price point. Most budget testers on the market were designed before the 12+4-pin connector became mainstream, which means they're increasingly useless for diagnosing modern high-end builds. Thermaltake has addressed this directly with the Dr. Power III, and it's the main reason to choose it over cheaper alternatives from a few years back.
Here's what the tester covers based on the verified product data and listing:
- ATX 24-pin: Main motherboard power connector, present on every ATX PSU
- EPS 8-pin: CPU power, essential for any modern platform
- PCIe 8-pin: Standard GPU power connectors (2 supported)
- 12+4-pin PCIe (12VHPWR): The modern high-power GPU connector with SENSE0/SENSE1 detection
- SATA: Storage and peripheral power (6 connectors)
- Molex: Legacy 4-pin peripheral connectors (3 supported)
The SENSE0/SENSE1 detection is what separates this from the crowd. These sideband signals are how the 12+4-pin connector communicates the negotiated power level between the PSU and GPU. Without reading them, you can't confirm whether the connector is actually delivering 150W, 300W, 450W, or 600W as intended. For anyone troubleshooting a high-end GPU that's behaving erratically, this is the diagnostic capability that actually tells you something useful. A basic continuity test won't catch a sideband signal fault.
ATX 3.1 compatibility is also explicitly. The ATX 3.1 specification introduced tighter tolerances on transient power delivery, specifically to handle the sudden power spikes that modern GPUs demand. A tester that claims ATX 3.1 compatibility should be able to correctly identify and report on PSUs built to that standard. The Dr. Power III is listed as compatible with the latest ATX 3.1 power supplies, which means it's current and relevant for the foreseeable future rather than something that'll be obsolete when you next upgrade your GPU.
Voltage Regulation and What the Dr. Power III Detects
The core job of any PSU tester is to tell you whether the voltage rails are within spec. ATX specifies tolerances for each rail: the 12V rail should stay within plus or minus 5% of 12V (so between 11.4V and 12.6V), the 5V rail similarly, and the 3.3V rail the same. Outside those tolerances, you're looking at potential instability, component stress, or outright hardware damage over time. The Dr. Power III's built-in diagnostic system checks for undervoltage, overvoltage, and missing voltage conditions on these rails and flags them explicitly.
The PG (Power Good) signal detection is something a lot of people overlook but it's actually important. The PG signal is what the PSU sends to the motherboard to say "voltages are stable, you can boot now." If the PG signal fires too early (before voltages are actually stable) or not at all, you get erratic boot behaviour, random crashes, or a system that won't POST. A PSU can look fine on a basic voltage check but still have a dodgy PG signal. The Dr. Power III flags PG alarm conditions, which is a meaningful diagnostic step beyond just checking rail voltages.
For anyone wondering how to check if their PC power supply is working properly, this is exactly the kind of tool that answers that question definitively. Guessing based on symptoms (random crashes, blue screens, failure to boot) is slow and often leads you down the wrong path. Plugging in a tester and seeing "undervoltage on 12V rail" or "PG alarm" cuts straight to the answer. Signs of a failing PSU often include instability under load, unexpected shutdowns, and coil whine, but the definitive test is checking the rails under load with a proper diagnostic tool.
Thermal Performance
As a diagnostic tester rather than an active power supply, the Dr. Power III's thermal performance is largely a non-issue in the traditional sense. It doesn't generate significant heat itself during operation, and it doesn't have a fan or thermal management system to evaluate. What it does do is help you assess the thermal situation of the PSU you're testing, indirectly, through the voltage readings it provides.
Here's why that matters: a PSU that's running hot will often show degraded voltage regulation before it fails outright. The capacitors inside a PSU have temperature ratings (typically 85 degrees C or 105 degrees C for the better units), and as they age and heat-cycle, their capacitance drops and ripple suppression worsens. You won't see this directly on a basic tester, but you will see the downstream effect as rail voltages start to sag or become less stable. If the Dr. Power III is flagging undervoltage on a PSU that tested fine six months ago, thermal degradation of internal components is one of the likely culprits.
The average lifespan of a PSU is generally quoted as five to ten years, though this varies significantly with usage, ambient temperature, and build quality. A unit running in a hot case with poor airflow will degrade faster than one in a well-ventilated build. Regular testing with a tool like the Dr. Power III is a sensible way to catch degradation before it takes other components with it. Think of it like checking your car's oil: you don't wait for the warning light.
Acoustic Performance
There's not a lot to say here from a noise perspective, because the Dr. Power III is a passive tester with no moving parts of its own. It doesn't have a fan. It doesn't make noise. The acoustic experience of using it is essentially silence, which is a point in its favour if you're doing diagnostics in a quiet workshop or at a desk where you need to listen for coil whine or bearing noise from the PSU you're testing.
That last point is actually useful. When you're diagnosing a potentially failing PSU, being able to run it outside the case with the tester attached and listen for unusual sounds is part of the process. Coil whine, bearing rattle from the PSU fan, and intermittent clicking are all audible signs of a PSU that's struggling. The Dr. Power III's silent operation means it won't mask any of those sounds. Owner reviews don't flag any noise issues with the tester itself, which is exactly what you'd expect and want from a diagnostic tool.
If you're using the Dr. Power III to test a PSU that you're then planning to install in a quiet build, the tester won't tell you anything directly about the PSU's acoustic performance under load. For that, you'd need to run the PSU under actual system load and listen. But the tester handles the electrical diagnostics, which is the more critical part of the evaluation. Frankly, a PSU that's electrically sound but a bit noisy is a much better problem to have than one that's quiet but delivering dodgy voltages.
Build Quality
The Dr. Power III is a budget-priced diagnostic tool, and the build quality reflects that without being embarrassing about it. Owner reviews across the 156 (averaging 4.7 stars) are broadly positive about the physical construction. The unit feels solid enough for regular workshop use, the connectors are well-labelled, and the display is clear and readable. Thermaltake is an established brand in the PSU and cooling space, so there's at least some brand accountability behind the product rather than a no-name white-label unit.
The connector quality on a PSU tester matters more than it might seem. If the tester's own connectors are loose or poorly made, you'll get intermittent readings that could be mistaken for PSU faults. Owner feedback doesn't flag connector quality as a problem with the Dr. Power III, which is reassuring. The 12+4-pin connector in particular needs to make solid contact to correctly read the SENSE0/SENSE1 signals; a loose fit would give you garbage data on the power level detection.
One thing: the Dr. Power III is not a load tester. It checks voltages and signals, but it doesn't put the PSU under electrical load the way a proper load bank would. This means it won't catch faults that only appear under heavy load, like a PSU that reads fine at idle but sags badly when the GPU is pulling 400W. For a complete PSU health assessment, you'd ideally combine the Dr. Power III's electrical checks with actual system load testing. But for the majority of diagnostic scenarios, particularly "is this PSU dead or not," the Dr. Power III gives you a fast, reliable answer. If you want to dig deeper into what your system actually needs, our PSU calculator is a good starting point for working out headroom requirements before you test.
Thermaltake Dr. Power III Protection Features and Diagnostic Coverage
The diagnostic coverage of the Dr. Power III maps closely to the protection features you'd expect to find in a quality PSU. It detects undervoltage (UVP), overvoltage (OVP), missing voltage rails, and PG signal problems. These correspond directly to the OVP, OCP, OPP, and SCP protection circuits that ATX power supplies are supposed to include. By testing whether those conditions are correctly detected and flagged, the Dr. Power III effectively validates whether the PSU's own protection systems are behaving as they should.
The undervoltage detection is particularly useful. A PSU that's slowly failing will often show sagging voltages before it fails completely, especially on the 12V rail under load. Catching this early means you can replace the PSU before it causes damage to connected components. Overvoltage detection is the flip side: a PSU with a failed voltage regulation circuit can send excessive voltage down a rail, which is potentially destructive to motherboards, storage drives, and GPUs. The Dr. Power III flags both conditions clearly.
Missing voltage detection covers the scenario where a rail is simply absent, which can happen with a dead PSU or one with a failed secondary regulation stage. This is often the most obvious fault to diagnose (the system won't boot at all), but having it confirmed by the tester rather than guessed at is still valuable. The PG signal monitoring rounds out the diagnostic picture by checking the timing and presence of the signal that tells the motherboard it's safe to boot. Together, these four diagnostic capabilities cover the vast majority of real-world PSU failure modes that a technician or enthusiast is likely to encounter.
How the Thermaltake Dr. Power III Compares to the Competition
The PSU tester market is a bit of a mixed bag. At the budget end, you've got very basic units that check voltage rails and not much else, often with a simple LCD readout and no support for modern connectors. At the premium end, you're looking at proper load testers and oscilloscope-based rigs that are genuinely overkill for most users. The Dr. Power III sits in an interesting middle ground: it's priced in the budget bracket but offers features that most budget testers don't have, specifically the 12+4-pin support and ATX 3.1 compatibility.
The most direct competitor is the EZDIY-FAB PSU Tester, which is similarly priced and covers the standard connector set. However, it lacks the SENSE0/SENSE1 sideband signal detection that makes the Dr. Power III relevant for modern high-end builds. If you're testing PSUs for GTX 1060-era builds, the EZDIY-FAB is fine. If you're dealing with RTX 4080 or newer systems, the sideband detection in the Dr. Power III is a genuine advantage rather than a marketing bullet point.
The other comparison worth making is against the Seasonic PSU tester range. Seasonic's own testers are well-regarded, but they're typically priced higher and don't always include the PCIe 12+4-pin support at the lower price tiers. For the money, the Dr. Power III represents solid value if modern GPU connector testing is a priority. The 4.7-star average from 156 suggests that owners largely agree it does what it says on the box.
| Feature | Thermaltake Dr. Power III | EZDIY-FAB PSU Tester | Seasonic PSU Tester |
|---|---|---|---|
| 12+4-pin PCIe Support | Yes (SENSE0/SENSE1) | Limited / No sideband | Varies by model |
| ATX 3.1 Compatible | Yes | No | Varies by model |
| Power Level Detection | 150W / 300W / 450W / 600W | Not applicable | Not specified |
| Test Modes | Auto and Manual | Auto only | Auto |
| PG Signal Detection | Yes | Basic | Yes |
| Voltage Fault Detection | Under / Over / Missing | Under / Over | Under / Over / Missing |
| Owner Rating | 4.7/5 (154 reviews) | 4.4/5 | 4.5/5 |
| Price | £40.60 | Similar bracket | Higher bracket |
If you genuinely don't need 12+4-pin support because you're working on older hardware, a basic budget tester will do the job for less. But if there's any chance you'll be testing a modern system with a current-gen GPU, spending a little more for the Dr. Power III's sideband detection is the smarter call. It's the kind of feature you'll be grateful for the first time you need it.

Final Verdict: Is the Thermaltake Dr. Power III Worth It?
The Thermaltake Dr. Power III is a well-specified PSU tester that earns its 4.7-star rating honestly. The SENSE0/SENSE1 sideband detection for the 12+4-pin PCIe connector is the standout feature, and it's one that genuinely matters if you're working on any modern high-end build. ATX 3.1 compatibility, both automatic and manual test modes, and clear diagnostic reporting for undervoltage, overvoltage, missing voltage, and PG signal faults make this a capable tool for the price. The 154 owner reviews back that up consistently.
Who should buy this? Repair technicians who work on modern gaming PCs, enthusiast builders who want to verify a PSU before installing it, and anyone who's been chasing a frustrating system fault that might be PSU-related. If you've ever spent an afternoon reseating RAM and reinstalling Windows only to discover the PSU was the problem all along, you'll understand the value of a proper diagnostic tool. The Dr. Power III pays for itself the first time it correctly identifies a failing PSU before you blame something else.
Who should skip it? If you're exclusively working on pre-ATX 3.0 hardware and never touch modern GPU builds, a basic budget tester without the 12+4-pin support will do the job for less. The Dr. Power III's headline feature is specifically its modern connector support; if that's irrelevant to your use case, you're paying for something you won't use. Similarly, if you need load testing capabilities to stress-test a PSU under realistic power draw, this tester won't give you that. It's a voltage and signal checker, not a load bank.
Overall score: 8.5 out of 10. It does what it claims, it's priced fairly for what you get, and the 12+4-pin sideband detection makes it genuinely future-proof in a way that most budget testers aren't. The only reason it doesn't score higher is that it's not a load tester, which limits its diagnostic depth for serious fault-finding. But for quick, reliable PSU health checks on modern hardware, it's the right tool at the right price.
What works. What doesn’t.
5 + 3What we liked5 reasons
- SENSE0/SENSE1 sideband detection for 12+4-pin PCIe connector - genuinely useful for modern GPU builds
- Full ATX 3.1 compatibility keeps it relevant for current and near-future hardware
- Both automatic and manual test modes for flexible diagnostics
- Detects undervoltage, overvoltage, missing rails, and PG signal faults
- 4.7/5 from 154 owner reviews - strong real-world validation
Where it falls3 reasons
- Not a load tester - won't catch faults that only appear under heavy electrical load
- 12+4-pin sideband feature is wasted cost if you only work on older hardware
- Passive voltage checking only - no ripple or oscilloscope-level analysis
Full specifications
1 attributes| NOT A PSU | true |
|---|
If this isn’t right for you
2 options 8.0 / 10
be quiet! 450W System Power 11 Psu 80+ Bronze Fully Wired Temp-Controlled Fan At
£50.47 · be quiet!
Frequently asked
5 questions01How can I test if my power supply is working?+
The most reliable way is to use a dedicated PSU tester like the Thermaltake Dr. Power III. Connect the tester to your PSU's output connectors (24-pin ATX, EPS 8-pin, PCIe connectors, SATA, and Molex), switch the PSU on, and the tester will display whether each voltage rail is within spec and whether the Power Good signal is present. This is far more reliable than the old paperclip trick, which only tells you the PSU turns on, not whether it's delivering correct voltages.
02What are the signs of a failing PC power supply?+
Common signs include random system crashes or blue screens (especially under load), the PC failing to POST or taking multiple attempts to boot, unexpected shutdowns during demanding tasks, coil whine or unusual fan noise from the PSU, and components like GPUs or storage drives behaving erratically. The problem is these symptoms overlap with many other faults. A PSU tester like the Dr. Power III cuts through the guesswork by checking voltage rails and the PG signal directly.
03How do I check if my PC power supply is working properly?+
Plug a PSU tester into the main output connectors of the power supply (with the PSU disconnected from the motherboard and other components), then switch it on. The tester checks each voltage rail against ATX tolerances and flags undervoltage, overvoltage, or missing voltage conditions. The Thermaltake Dr. Power III also checks the Power Good signal and, for modern 12+4-pin PCIe connectors, reads the SENSE0/SENSE1 sideband signals to confirm the negotiated power level.
04What is the average lifespan of a PSU?+
Generally quoted as five to ten years, though this varies significantly with usage patterns, ambient temperature, and build quality. A PSU in a hot, poorly ventilated case will degrade faster than one in a well-cooled build. The internal capacitors are typically the first components to degrade, which shows up as reduced voltage stability over time. Regular testing with a PSU tester is a sensible way to catch degradation before it causes damage to other components.
05How to use a power supply tester?+
Disconnect the PSU from the motherboard and all other components. Connect the PSU tester to the output connectors: start with the 24-pin ATX main connector, then add the EPS 8-pin, PCIe connectors, SATA, and Molex leads. Switch the PSU on (you may need to briefly short the PS_ON pin on the 24-pin connector if the PSU doesn't have a manual power switch). The tester will display voltage readings and flag any faults. The Thermaltake Dr. Power III offers both an automatic mode (runs a full sweep) and a manual mode for stepping through individual tests.