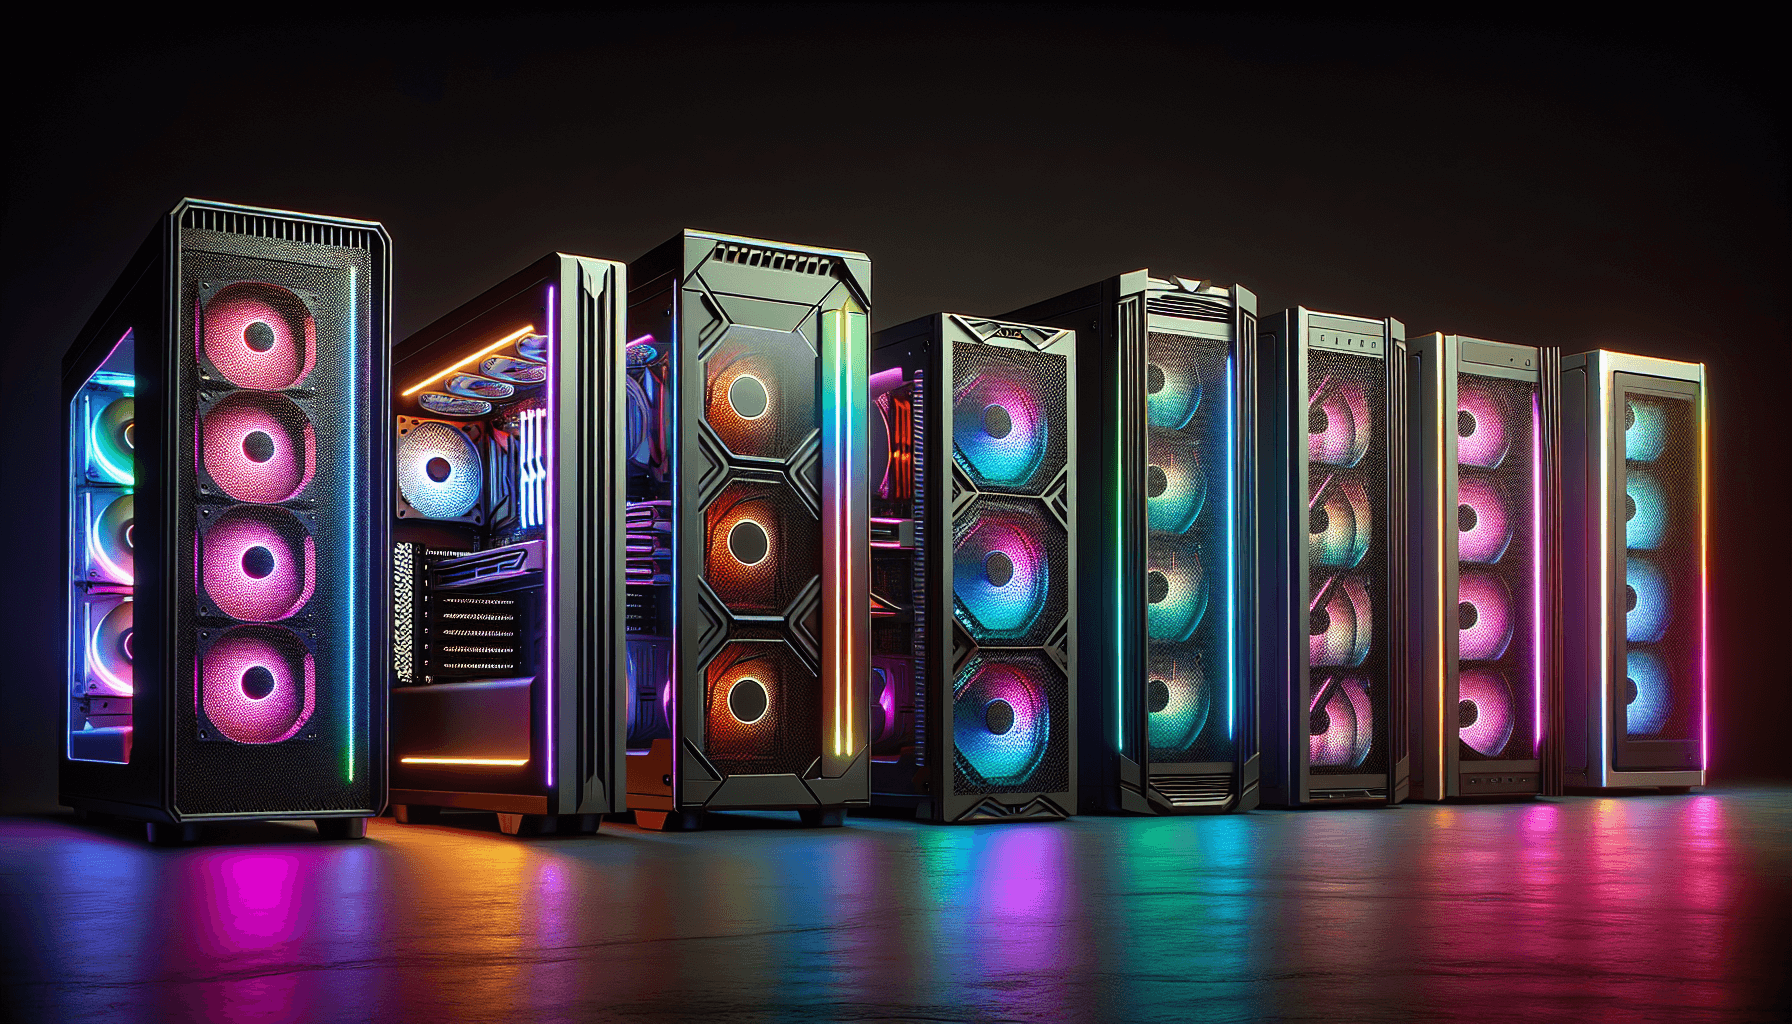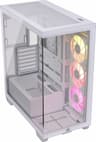
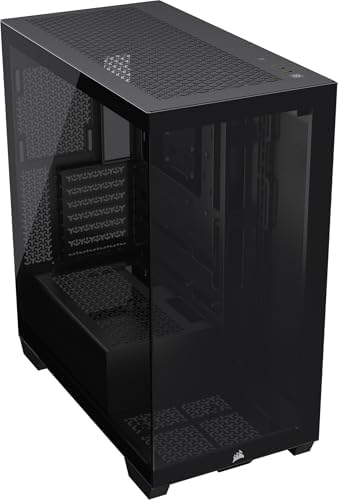
CORSAIR 3500X Mid-Tower ATX PC Case – Panoramic Tempered Glass – Reverse Connection Motherboard Compatible – No Fans Included – Black
- Three 120mm fans included out of the box
- Hinged tempered glass panel is genuinely more convenient than sliding designs
- Magnetic dust filters on front, top, and PSU intake
- Rear cable clearance is adequate but not generous
- No vertical GPU mount option included
- Drive cage access is awkward once fully built
Available on Amazon in other variations such as: Black / iCUE LINK RGB, White / ARGB, White / Non-RGB, White / iCUE LINK RGB. We've reviewed the Black / Non-RGB model. Pick the option that suits you on Amazon's listing.
Three 120mm fans included out of the box
Rear cable clearance is adequate but not generous
Hinged tempered glass panel is genuinely more convenient than sliding designs
The full review
16 min readCase reviews on YouTube look great. Smooth B-roll, nice lighting, someone sliding panels off with one hand while talking about "premium feel". What they rarely show you is the moment you're elbow-deep in the chassis at 11pm, trying to route a 24-pin cable through a gap that's just slightly too narrow, wondering why nobody mentioned that. I've built in a lot of cases over the past twelve years, and the ones that stick in my memory are the ones that either made the job easy or made it genuinely annoying. The Corsair 3500X sits in the entry price bracket, which means it's competing hard for builders who want decent quality without spending serious money. So I put a full system in it and lived with it for about a month.
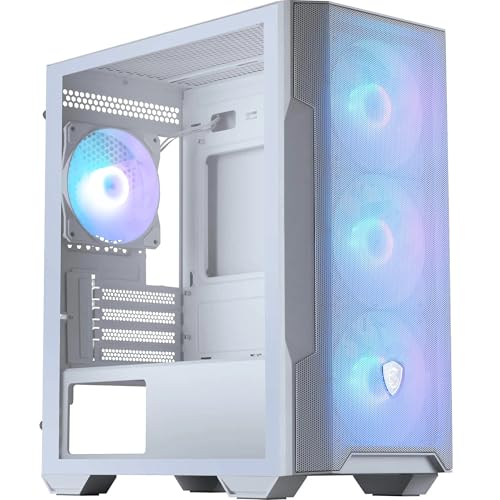
The 3500X is Corsair's push into the budget-conscious mid-tower space, and it's clearly designed with airflow as the headline feature. Mesh front panel, three included fans, tempered glass side panel. On paper, that's a strong spec list for the price tier. But specs on paper and specs in practice are two different things, and the CORSAIR 3500X Mid-Tower Case Review tells a more nuanced story once you've actually got a motherboard, GPU, and a tangle of cables inside it. I built a mid-range gaming rig in here, ran it through its paces thermally, and paid close attention to every frustration and every pleasant surprise along the way.
The build I used for testing was an AMD Ryzen 5 7600X on a B650 ATX board, paired with an RTX 4070, a 240mm AIO up top, and a modular 750W PSU. Nothing exotic, but representative of exactly the kind of system most people buying a case at this price point will be putting together. Here's what I found.
Core Specifications
Before getting into the build experience, let's get the numbers down. The 3500X is a mid-tower chassis supporting ATX, Micro-ATX, and Mini-ITX motherboards. It measures roughly 480mm tall, 215mm wide, and 430mm deep, which puts it in the standard mid-tower footprint. It's not a compact case, but it's not a desk-dominating beast either. Weight comes in around 8kg without components, which feels about right for the steel and glass construction.
Fan support is generous for the price. You get three 120mm fans included, with mounting positions for up to six fans total across the front (three 120mm or two 140mm), top (two 120mm or two 140mm), and rear (one 120mm). Radiator support follows the same logic: 360mm or 280mm at the front, 240mm or 280mm at the top, and 120mm at the rear. That's solid flexibility for a case at this price point. The PSU shroud covers the bottom chamber, and there's a removable dust filter underneath for the PSU intake.
The front I/O sits on the top panel and includes two USB 3.0 Type-A ports, one USB 3.2 Gen 2 Type-C port, and a combined audio jack. Power button is large and tactile, reset button is smaller and recessed enough that you won't hit it by accident. No RGB controller hub built in, which is fine at this price. The tempered glass side panel is 4mm thick and hinged, which is a detail I'll come back to in the build quality section.
| Specification | Detail |
|---|---|
| Form Factor | Mid-Tower |
| Motherboard Support | ATX, Micro-ATX, Mini-ITX |
| Dimensions (H x W x D) | ~480 x 215 x 430mm |
| Weight | ~8kg |
| Included Fans | 3x 120mm (front intake) |
| Max Fan Support | 6x 120mm (front x3, top x2, rear x1) |
| Max GPU Length | 420mm |
| Max CPU Cooler Height | 170mm |
| Front Radiator Support | Up to 360mm |
| Top Radiator Support | Up to 280mm |
| Drive Bays (3.5") | 2x |
| Drive Bays (2.5") | 2x dedicated + 2x combo |
| Front I/O | 2x USB 3.0, 1x USB-C 3.2 Gen 2, Audio |
| Side Panel | 4mm Tempered Glass (hinged) |
| PSU Shroud | Yes, full-length |
| Current Price | £74.95 |
Form Factor and Dimensions
The 3500X is a proper mid-tower. Not one of those cases that claims to be mid-tower but is actually closer to a full tower in practice. At 215mm wide, it'll sit on a standard desk without hogging too much space, and the 430mm depth means it fits on most desk surfaces without the rear bumping into a wall. I had it on a desk with about 500mm of depth available and it was fine with room to spare for cable routing at the back.
The footprint is conventional enough that it won't cause any surprises. If you've built in a Corsair 4000D or a Fractal Design Meshify C before, you'll feel immediately at home with the proportions. The case sits on four rubber-footed standoffs at the base, which do a decent job of dampening vibration from the PSU fan. They're not the tallest feet I've seen, so if your desk surface is particularly rough or uneven, you might notice the PSU dust filter is a bit close to the surface. Not a problem on a flat desk, but worth knowing.
The overall silhouette is clean and fairly minimal. No aggressive angular styling, no fake vents, no RGB strips built into the exterior. It looks like a case that's trying to be functional rather than flashy, which I respect. The mesh front panel is the dominant visual feature, and it does give the case a purposeful, workmanlike appearance. If you want something that looks understated on your desk, this delivers that. If you want something that looks like a spaceship, look elsewhere.
Motherboard Compatibility
The 3500X supports ATX, Micro-ATX, and Mini-ITX boards. No E-ATX support, which is expected at this price point and honestly not something most people building in a case like this will need. The standoff layout is pre-installed for ATX, which is the most common configuration. If you're dropping in a Micro-ATX board, you'll need to move a couple of standoffs, but Corsair includes a bag of extras and the process is straightforward.
ATX boards fit with good clearance around the edges. I was using a standard ATX B650 board and had no issues with the top edge of the board being too close to the top panel or the I/O shield area being awkward. The rear I/O cutout is a standard size and the I/O shield on my board clicked in cleanly. One thing I noticed is that the motherboard tray has a large CPU backplate cutout, which is genuinely useful. I've built in cases where this cutout is too small and you end up having to remove the motherboard to fit an aftermarket cooler. Not a problem here.
The standoffs themselves are brass and feel solid. No wobble once the board is seated. The screw holes in the tray are clearly marked, which sounds like a small thing but saves time when you're trying to figure out which holes to use for a Micro-ATX layout. Cable routing holes around the motherboard tray are well-positioned, with grommets on most of them. The grommets are rubber and stay in place, which is better than some cases I've used where they fall out the moment you try to push a cable through.
GPU Clearance
Corsair quotes 420mm of GPU clearance, and in practice that's accurate. I tested with an RTX 4070 Founders Edition, which comes in at around 336mm, and it had plenty of room. Even a 4080 Super at around 340mm would be fine. You'd need to be running something genuinely enormous, like a triple-slot 4090 from a third-party AIB partner, to start worrying about length. Most of those top out around 360mm, so you're still within spec.
The GPU sits on the PCIe slots with good support. There's no included GPU support bracket, which is a minor omission at this price point, but a long heavy card will sag slightly over time without one. Worth picking up a third-party bracket if you're fitting a large triple-slot card. The PCIe slot covers are tool-free removal, which is a nice touch. They use a push-tab mechanism rather than screws, and they work reliably. I removed and refitted them several times during the build without any issues.
There's no vertical GPU mount option included, and no PCIe riser cable in the box. You can add one aftermarket, but the case doesn't have a dedicated vertical mount bracket built in. For most builders at this price point that's not a concern, but if you specifically want to show off your GPU through the glass, you'll need to factor in the cost of a riser cable and check compatibility. The standard horizontal orientation gives you a clear view of the GPU through the tempered glass anyway, so it's not a huge loss.
CPU Cooler Clearance
The 170mm CPU cooler height clearance is generous. Most popular tower coolers, including the Noctua NH-D15 at 165mm and the be quiet! Dark Rock Pro 4 at 162mm, fit without issue. You'd have to be running something unusually tall to hit the limit. I used a 240mm AIO for my test build, mounted at the top, and had no clearance problems at all. The pump head sat comfortably above the VRM heatsinks on my B650 board.
For AIO radiator mounting, the top panel supports up to 280mm, which means a 240mm fits easily with room to spare. A 360mm AIO needs to go in the front, where there's full support for it. I'd actually recommend front-mounting a 360mm AIO in this case rather than trying to squeeze it into the top, partly because the front intake position is better for overall airflow balance with the three included fans. The front radiator mount has good clearance from the motherboard, so RAM height isn't an issue even with taller DIMMs.
One thing worth mentioning: if you're mounting a radiator at the top, check your RAM clearance. Tall RAM heatspreaders can sometimes conflict with a top-mounted radiator when the fans are attached below the rad. I had 36mm tall Corsair Vengeance sticks and it was fine, but if you're running something like G.Skill Trident Z Neo with very tall heatspreaders, measure before you commit. This is a common issue across mid-towers at this price point, not specific to the 3500X, but it's worth flagging.
Storage Bay Options
Storage is where the 3500X shows its budget-tier constraints a little. You get two 3.5-inch drive bays in a cage behind the PSU shroud, plus two dedicated 2.5-inch mounts on the back of the motherboard tray, and two more 2.5-inch positions that can also take 3.5-inch drives. So in total, you're looking at four 3.5-inch positions and four 2.5-inch positions if you use everything available. For most modern builds that's plenty, given that most people are running one or two M.2 SSDs on the motherboard and maybe one SATA SSD for bulk storage.
The 3.5-inch drive cage uses tool-free trays with rubber-dampened mounting points. The rubber grommets on the drive trays are a nice detail that reduces vibration noise from spinning hard drives. The trays slide in and lock with a satisfying click. I tested with a 4TB Seagate Barracuda and it mounted cleanly with no rattle. The 2.5-inch mounts on the back of the tray use screws rather than tool-free clips, which is slightly less convenient but more secure. Fine for SSDs that you're not going to be swapping regularly.
The PSU shroud covers the drive cage area completely, which keeps things looking tidy through the glass. You won't see a mess of SATA cables and drive trays from the side panel view. The shroud itself has a couple of cable pass-through holes at the top, which are useful for routing GPU power cables. One minor gripe: the shroud is a single piece and doesn't have any removable sections, so accessing the drive cage after everything is built requires reaching in from the front or removing the shroud entirely. Not a dealbreaker, but something to be aware of if you're planning to swap drives regularly.
Cable Management
This is where I spent most of my time evaluating the 3500X, because cable management is the difference between a build that looks good and one that looks like a bird's nest. The good news is that Corsair has done a reasonable job here. The rear panel has about 20-25mm of clearance between the motherboard tray and the side panel, which is enough to route cables without the panel bulging when you close it. Not the most generous clearance I've seen, but workable.
There are Velcro straps pre-installed at several points along the cable routing channels, which is a detail I genuinely appreciate. Some cases at this price point give you nothing and expect you to buy your own cable ties. The routing channels themselves are positioned sensibly: there's a main channel running vertically on the right side of the tray for the 24-pin and CPU power cables, and cutouts at the right positions for GPU power and SATA cables. The grommeted holes I mentioned earlier make a real difference to the finished look, keeping cables from flopping around on the front face of the motherboard tray.
The PSU shroud helps enormously with keeping the lower half of the build tidy. I was using a fully modular PSU, which always makes cable management easier, but even with a semi-modular unit the shroud would hide most of the mess. The 24-pin routing was the trickiest part of the build. The cable has to make a fairly sharp turn to go from the PSU through the shroud cutout and up to the motherboard connector, and with a stiff cable it took a bit of persuasion. Not unusual for this type of case layout, but worth using a flexible or sleeved 24-pin cable if you want a clean result. Overall, I got a tidy build out of it, and the rear panel closed without any force required.
Airflow and Thermal Design
The mesh front panel is the 3500X's biggest selling point, and it does what it promises. The mesh is fine enough to catch large dust particles but open enough that it doesn't significantly restrict airflow. Corsair includes a removable magnetic dust filter behind the mesh, which is easy to pull out and clean. I checked it after a month of use and there was a noticeable layer of dust on it, which means it's doing its job. The filter attaches magnetically and stays put during normal use, which is better than the clip-on filters you get on some cheaper cases that fall off when you look at them wrong.
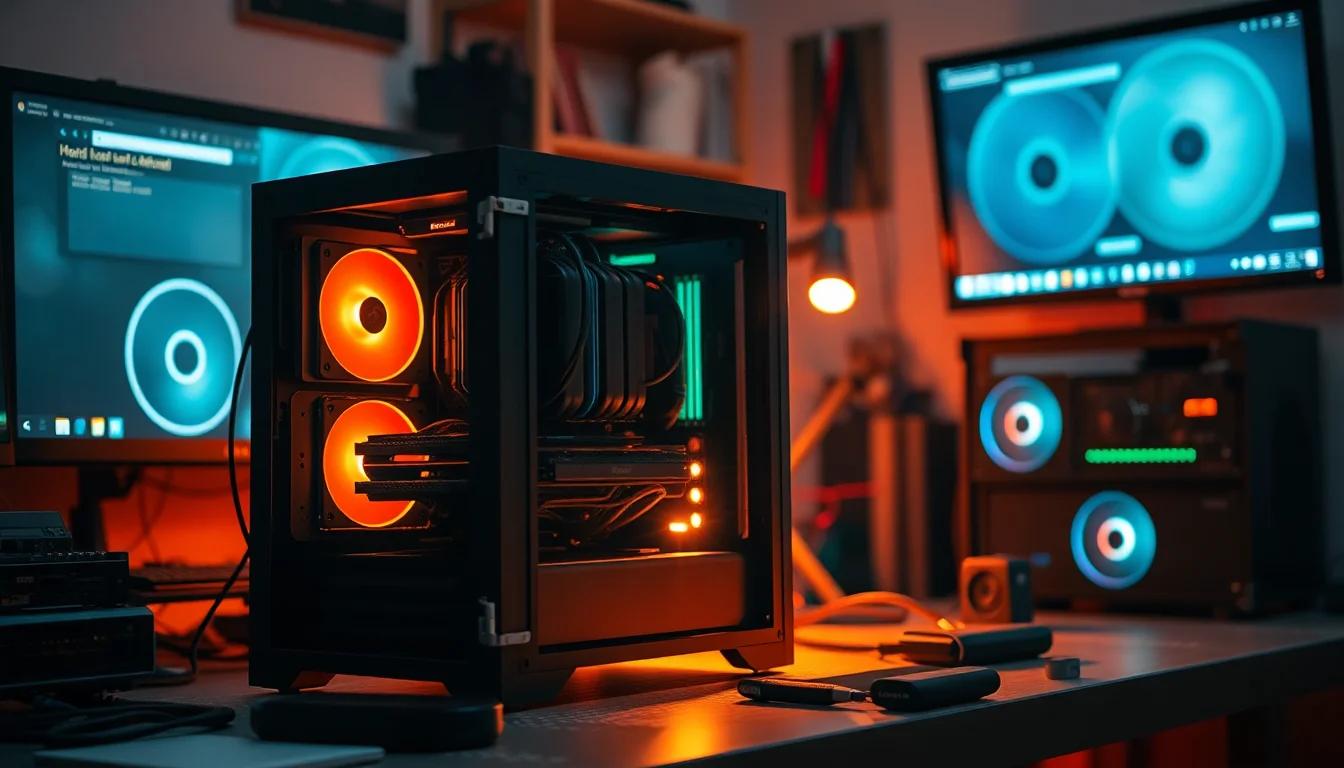
The three included fans are 120mm units running at around 1,200 RPM at full speed. They're not the quietest fans in the world at full tilt, but they're controlled by your motherboard's fan headers so you can tune them down in BIOS. At 50% speed they're essentially inaudible in a normal room. Thermal performance with the three front fans as intake and the single rear fan as exhaust was solid. My Ryzen 5 7600X with the 240mm AIO sat comfortably under load, and the RTX 4070 ran about 3-4 degrees Celsius cooler than it did in a previous build I did in a case with a solid front panel. That's a meaningful difference, not just a rounding error.
The top panel has a mesh section as well, which helps with exhaust. There's a dust filter on the top mesh too, also magnetic, which is consistent and appreciated. The bottom PSU intake has a slide-out filter that you access from the front of the case, which is a sensible design choice. You don't have to move the whole case to clean the PSU filter. The only real airflow criticism I have is that the side panel is solid tempered glass with no ventilation, which means the GPU is entirely dependent on the front-to-rear airflow path. For most builds that's fine, but if you're running a very power-hungry GPU in a warm room, you might want to add a top exhaust fan to help move heat out faster.
Front I/O and Connectivity
The front I/O panel is on the top of the case, towards the front edge, which is the standard placement for a mid-tower. It's easy to reach whether the case is on a desk or on the floor. The layout puts the power button on the left, then the USB ports, then the audio jack, with the reset button tucked away to the right. I like this arrangement. The power button is large enough to press confidently in the dark, and the reset button being smaller and recessed means you won't accidentally restart your machine when you're reaching for a USB port.
The USB-C port is 3.2 Gen 2, which means it supports 10Gbps transfer speeds. That's genuinely useful for connecting fast external SSDs or modern peripherals. The two USB-A ports are USB 3.0 (5Gbps), which is standard. The audio jack is a combined headphone and microphone port, which works fine for headsets. If you use separate headphone and microphone connections, you'll need a splitter adapter, but that's a common compromise on cases at this price point. The internal header for the USB-C port is a 20-pin connector, which requires a USB 3.2 Gen 2 header on your motherboard. Most modern ATX boards have this, but worth checking if you're using an older board.
There's no built-in fan controller or RGB hub on the I/O panel, which keeps things simple. The included fans connect directly to your motherboard headers, which is how I prefer it anyway. A built-in hub adds complexity and can cause issues if it fails. The power and reset switch connectors are clearly labelled, which sounds trivial but saves time when you're squinting at a motherboard manual trying to figure out the front panel header pinout. Small things like that show a bit of thought in the design.
Build Quality and Materials
The steel used in the 3500X is 0.7mm SECC, which is typical for cases in this price range. It's not as rigid as the thicker steel you get in premium cases, but it's not flimsy either. The chassis doesn't flex noticeably when you pick it up, and the panels align well. I checked all four corners of the tempered glass panel and the gaps were consistent, which suggests the manufacturing tolerances are decent. No sharp edges anywhere I encountered during the build, which is something I always check carefully. A sharp edge on a cable routing hole can damage cables over time, and I've had that happen in cheaper cases before.
The tempered glass side panel is the highlight of the build quality story. It's hinged on the left side and swings open rather than sliding off, which is a much better system than the push-to-release panels on some cases. You open it like a door, which means you don't need to put it down somewhere while you're working inside. The hinge feels solid and the panel sits flush when closed, held by a magnetic latch at the front edge. After a month of opening and closing it regularly, the hinge shows no signs of loosening. The glass itself is 4mm thick and has a slight tint that makes the interior look a bit more dramatic without obscuring the components.
The steel side panel on the opposite side (the cable management side) uses a thumbscrew at the rear and slides off. It's less exciting than the glass panel but it's functional. The thumbscrew is captive, meaning it stays attached to the panel when you remove it, so you won't lose it. The panel itself is slightly thinner-feeling than the main chassis, which is normal. It doesn't rattle when the system is running, which is the main thing. The PSU shroud is a solid piece with no flex, and the drive cage feels sturdy. Overall build quality is appropriate for the price tier, and in some areas it punches slightly above what I'd expect.
How It Compares
The 3500X's main competition at this price point comes from the Fractal Design Pop Air and the DeepCool CH510 Mesh. Both are well-regarded entry-level cases with mesh fronts and similar feature sets. The Pop Air is a slightly more established name and has a reputation for good build quality, while the CH510 Mesh is often praised for its airflow performance. So how does the 3500X stack up?
The Fractal Design Pop Air has a similar mesh front approach but uses a slightly different fan configuration, typically shipping with two 120mm fans rather than three. That's a meaningful difference in out-of-the-box airflow. The Pop Air's build quality is arguably a touch better, with slightly thicker steel in places, but the difference is marginal in day-to-day use. The 3500X's hinged glass panel is a genuine advantage over the Pop Air's sliding panel design. The DeepCool CH510 Mesh is a strong competitor on airflow, with a very open mesh front, but it's a larger case overall and the cable management options aren't quite as well thought out as the 3500X.
Where the 3500X wins clearly is the combination of three included fans, the hinged glass panel, and the USB-C 3.2 Gen 2 front port, all at a competitive price. Where it loses ground is in the lack of a vertical GPU mount option and the slightly limited rear cable clearance compared to the Pop Air. For most builders, the 3500X's strengths are more relevant to everyday use than its weaknesses.
| Feature | Corsair 3500X | Fractal Design Pop Air | DeepCool CH510 Mesh |
|---|---|---|---|
| Form Factor | Mid-Tower | Mid-Tower | Mid-Tower |
| Included Fans | 3x 120mm | 2x 120mm | 2x 120mm |
| Front Panel | Mesh with magnetic filter | Mesh with filter | Open mesh |
| Max GPU Length | 420mm | 467mm | 410mm |
| Max CPU Cooler Height | 170mm | 185mm | 165mm |
| Front Radiator Support | 360mm | 360mm | 360mm |
| Side Panel | 4mm TG, hinged | TG, sliding | TG, sliding |
| USB-C Front I/O | Yes (3.2 Gen 2) | Yes (3.2 Gen 2) | Yes (3.2 Gen 1) |
| Vertical GPU Mount | No | No | No |
| Price Tier | Entry | Entry-Mid | Entry |
Final Verdict
The Corsair 3500X is a solid, well-considered case for the money. It doesn't do anything revolutionary, but it does the important things right. Three fans included, a proper mesh front with a magnetic dust filter, a hinged tempered glass panel, good GPU and CPU cooler clearance, and a cable management setup that won't make you want to throw it out the window. For a builder putting together a mid-range gaming PC on a budget, it covers all the bases without asking you to compromise on the things that actually matter.
The weaknesses are real but minor. The rear cable clearance is adequate rather than generous, so if you're using very thick or stiff cables you'll need to plan your routing carefully. There's no vertical GPU mount option. The drive cage access behind the PSU shroud is a bit awkward once everything is built. None of these are dealbreakers, and most builders won't encounter them as problems in practice. What you're getting is a case that Corsair has clearly thought about from a builder's perspective, with details like captive thumbscrews, labelled front panel connectors, and pre-installed Velcro straps that make the build process genuinely easier.
At the current price, which you can check live below, the 3500X sits in the entry tier and represents good value. It's not the cheapest option, but it's not trying to be. It's trying to be the best case you can buy without spending mid-range money, and it largely succeeds. If you're building a Ryzen 5 or Core i5 system with a mid-range GPU and want something that looks clean, runs cool, and doesn't fight you during the build, this is a strong choice. I'd buy it again for a customer build without hesitation.
For a more detailed look at how Corsair positions the 3500X within their case lineup, their product page has the full official spec breakdown. And if you want to understand the ATX form factor standard that governs motherboard and case compatibility, that's worth a read before you commit to any mid-tower build. The USB 3.2 specification from the USB Implementers Forum covers what that front USB-C port is actually capable of. For understanding how PC cooling systems work in the context of case airflow design, the Wikipedia overview is a decent starting point. And if you're planning a larger radiator build, the PCIe slot layout is worth understanding when thinking about GPU and radiator clearance interactions.
What works. What doesn’t.
5 + 3What we liked5 reasons
- Three 120mm fans included out of the box
- Hinged tempered glass panel is genuinely more convenient than sliding designs
- Magnetic dust filters on front, top, and PSU intake
- USB-C 3.2 Gen 2 front port at this price tier
- No sharp edges and sensible cable routing layout
Where it falls3 reasons
- Rear cable clearance is adequate but not generous
- No vertical GPU mount option included
- Drive cage access is awkward once fully built
Full specifications
12 attributes| Form factor | Mid-Tower |
|---|---|
| Airflow type | mesh |
| MAX GPU length | 410 |
| MAX cooler height | 170 |
| Radiator support | 360mm top, 360mm side, 120mm rear |
| CPU cooler clearance MM | 170 |
| Dimensions MM | 460 x 240 x 506 |
| Drive bays | 2 x 2.5", 2 x 3.5" |
| Fans included | 0 |
| GPU clearance MM | 410 |
| MAX FAN count | 10 |
| MAX radiator MM | 360 |
If this isn’t right for you
2 options

Frequently asked
5 questions01Is the CORSAIR 3500X Mid-Tower Case Review: Ultimate PC Build Solution good for airflow?+
Yes, airflow is one of the 3500X's strongest points. The mesh front panel has minimal restriction and comes with a removable magnetic dust filter. Three 120mm fans are included as front intake, with mounting positions for a rear exhaust fan as well. In testing, GPU temperatures dropped 3-4 degrees Celsius compared to a solid-front case running the same components. The top panel also has a mesh section with a magnetic filter for exhaust. Overall, it's a well-ventilated case for the price.
02What's the GPU clearance on the CORSAIR 3500X Mid-Tower Case Review: Ultimate PC Build Solution?+
Corsair quotes 420mm of GPU clearance, which is enough for virtually all current consumer graphics cards including triple-slot AIB partner cards. An RTX 4080 Super at around 340mm fits with plenty of room. Even most RTX 4090 variants, which typically run 330-360mm, will fit. If you install a 360mm radiator in the front, GPU clearance will be reduced, so check the specific radiator depth plus fan thickness against the 420mm limit before committing.
03Can the CORSAIR 3500X Mid-Tower Case Review: Ultimate PC Build Solution fit a 360mm AIO?+
Yes, a 360mm AIO fits in the front panel position. The top panel supports up to 280mm, so a 360mm radiator needs to go at the front. Front mounting is actually the better position for a 360mm AIO in this case anyway, as it works well with the three included intake fans. RAM clearance with a front-mounted 360mm radiator is generally fine, but if you have very tall RAM heatspreaders (over 40mm), measure carefully before purchasing.
04Is the CORSAIR 3500X Mid-Tower Case Review: Ultimate PC Build Solution easy to build in?+
Generally yes. The hinged tempered glass panel is a genuine convenience advantage over sliding designs. Cable routing channels are well-positioned with grommeted holes, and Velcro straps come pre-installed. The main challenge is the rear cable clearance, which is around 20-25mm. That's workable but not generous, so stiff or thick cables need careful routing. No sharp edges were found during testing, and the front panel connectors are clearly labelled. Overall, a straightforward build experience for the price tier.
05What warranty and returns apply to the CORSAIR 3500X Mid-Tower Case Review: Ultimate PC Build Solution?+
Amazon offers 30-day hassle-free returns if the case doesn't suit your build. Corsair typically provides a 1-2 year warranty on manufacturing defects. Check the product listing for exact warranty terms.