GAMDIAS AURA GC1 Elite ARGB Case Review: Budget Gaming PC Build Solution
- Three 120mm ARGB fans included out of the box
- 380mm GPU clearance beats several competitors at this price
- 360mm front radiator support for AIO cooling
- No USB Type-C on the front I/O panel
- Cable routing channels are functional but not polished
- Front dust filter requires panel removal to access
Three 120mm ARGB fans included out of the box
No USB Type-C on the front I/O panel
380mm GPU clearance beats several competitors at this price
The full review
15 min readI've built PCs in well over a hundred different cases across twelve years, and I can tell you from painful experience that a poorly designed chassis will cost you more time and frustration than any other component in the build. We're talking about cases where the GPU clearance is 5mm shorter than advertised, where the cable routing channels are so shallow you're fighting the side panel shut, where the front panel mesh is basically decorative and your CPU temps sit 8-10°C higher than they should. Those aren't hypothetical complaints. I've lived every single one of them. So when I pick up a new case to test, I'm not looking for marketing language about "premium aesthetics" or "next-gen airflow". I'm measuring clearances with a tape measure, checking steel thickness by feel, and running a full build inside it for several weeks to see what actually breaks down.
The GAMDIAS AURA GC1 Elite ARGB Case Review: Budget Gaming PC Build Solution lands in the entry price tier, which is honestly where the most interesting case engineering happens right now. Budget cases used to be genuinely terrible. Thin steel, no cable management, one 80mm fan rattling around in the back. That's changed a lot. The question is whether the AURA GC1 Elite has kept pace with what competitors like Fractal and Corsair are doing at similar price points, or whether it's still coasting on RGB lighting and hope.
I built a complete mid-range gaming system inside this case and ran it for several weeks, paying close attention to thermals, build experience, and the kind of small details that only show up after you've actually lived with a chassis. Here's what I found.
Core Specifications
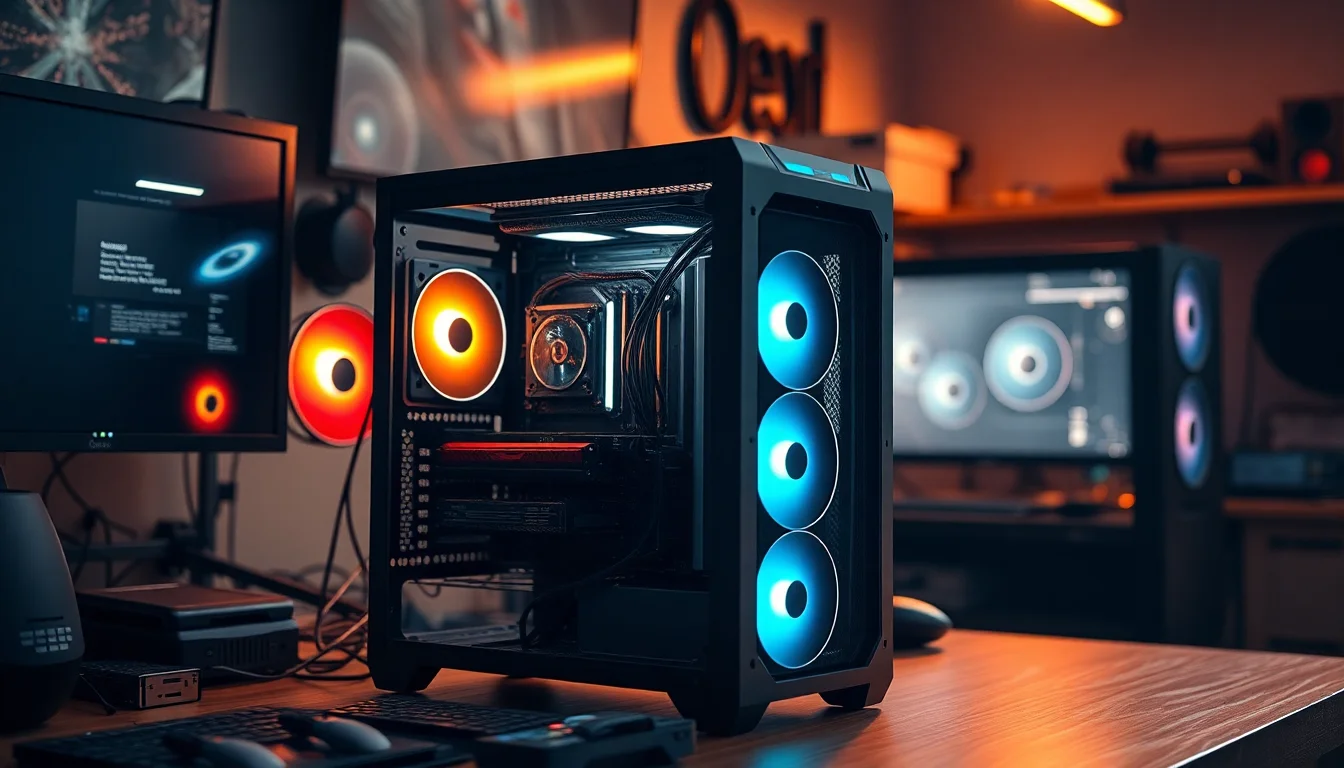
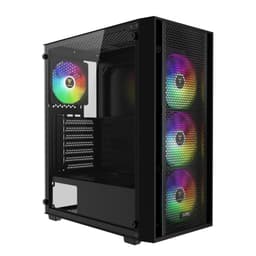
The GAMDIAS AURA GC1 Elite is a mid-tower ATX chassis built around a steel frame with a tempered glass side panel on the left. GAMDIAS positions this as a gaming-focused case with ARGB lighting built into the included fans, and the overall dimensions sit comfortably within the standard mid-tower footprint. The case ships with three 120mm ARGB fans pre-installed at the front, which is a decent starting point for a case at this price tier. The right side panel is steel, which is standard for budget cases, and the top panel has ventilation cutouts for radiator or fan mounting.
Drive storage is handled through a combination of 3.5-inch and 2.5-inch bays, with the PSU shroud covering the lower chamber and providing some separation between the main motherboard area and the power supply. The front I/O sits at the top of the case and includes USB 3.0 Type-A ports along with a headphone and microphone combo jack. There's no USB Type-C on the front panel, which is a notable omission at this price point in 2026, and I'll come back to that in the connectivity section.
The case supports standard ATX, Micro-ATX, and Mini-ITX motherboards, with the standoff layout pre-configured for ATX. Radiator support extends to 360mm at the front and 120mm at the rear, which gives you reasonable cooling flexibility. Here's the full spec breakdown:
| Specification | Detail |
|---|---|
| Form Factor | Mid-Tower |
| Motherboard Support | ATX, Micro-ATX, Mini-ITX |
| Dimensions (approx.) | 430mm (H) x 210mm (W) x 450mm (D) |
| Front Fan Support | 3x 120mm or 2x 140mm |
| Top Fan Support | 2x 120mm or 2x 140mm |
| Rear Fan Support | 1x 120mm |
| Included Fans | 3x 120mm ARGB (front) |
| Front Radiator Support | Up to 360mm |
| Top Radiator Support | Up to 240mm |
| Rear Radiator Support | 120mm |
| Max GPU Length | 380mm |
| Max CPU Cooler Height | 165mm |
| PSU Support | ATX (up to 160mm) |
| Drive Bays (3.5") | 2x |
| Drive Bays (2.5") | 2x dedicated + 2x combo |
| Side Panel | Tempered Glass (left), Steel (right) |
| Front I/O | 2x USB 3.0, HD Audio |
| Current Price | £68.27 |
Form Factor and Dimensions
At roughly 430mm tall, 210mm wide, and 450mm deep, the AURA GC1 Elite sits squarely in standard mid-tower territory. It's not a compact case by any stretch, but it's not oversized either. It'll fit on most standard desks without dominating the space, and the 210mm width means it won't be fighting for room next to a monitor stand or a set of speakers. I had it sitting on a desk alongside a 27-inch monitor and it didn't feel intrusive.
The footprint is actually quite sensible for what you're getting internally. Some budget cases try to look bigger than they are by adding decorative panels that eat into internal volume, but the GC1 Elite keeps things fairly honest. The depth of 450mm gives you enough room to work with for cable routing behind the motherboard tray, which I'll cover properly in the cable management section. The case doesn't feel cramped when you're actually building inside it, which matters more than the external measurements suggest.
Weight is reasonable for a steel mid-tower. It's not going to feel like a premium aluminium chassis, but it's solid enough that it doesn't flex when you pick it up by the top panel. The rubber feet on the base are a decent size and grip the desk well. I did notice the case has a slight tendency to rock if the surface isn't completely flat, which suggests the feet aren't perfectly level from the factory. Minor issue, but worth knowing if you're placing it on an uneven surface.
Motherboard Compatibility
The AURA GC1 Elite supports ATX, Micro-ATX, and Mini-ITX motherboards, with the standoff positions pre-installed for ATX. If you're dropping in a Micro-ATX board, you'll need to check which standoffs need removing, and the case ships with a small bag of extras. The standoff thread quality is acceptable, nothing special, but I didn't strip any during installation, which is more than I can say for some budget cases I've worked with. The motherboard tray itself is reasonably rigid and doesn't flex noticeably when you're tightening screws.
The I/O cutout at the rear is a standard size and aligned correctly on my test unit. No filing required, no awkward angles. The PCIe slot covers are the standard punch-out type rather than tool-free, which is a minor annoyance if you're swapping GPUs regularly, but it's completely normal at this price point. You get seven expansion slots in total, which covers ATX boards with room for a GPU and any additional cards you might want to add.
One thing I want to flag for anyone building with a larger ATX board: the top of the motherboard area has decent clearance to the top panel, so installing tall VRM heatsinks or boards with components near the top edge shouldn't cause problems. E-ATX is not supported, which is standard for a case of this size and price. If you're running an E-ATX workstation board, this isn't the chassis for you, but that's not really the target audience here anyway.
GPU Clearance
GAMDIAS quotes a maximum GPU length of 380mm, and from my measurements that figure is accurate. With no front radiator installed, you've got a genuine 380mm of usable length from the PCIe slot to the front of the case interior. I tested with a card sitting at around 340mm and had comfortable clearance with no contact issues. Modern triple-fan flagship cards from NVIDIA and AMD typically run between 320mm and 360mm, so the vast majority of current GPUs will fit without any drama.
Where it gets tighter is if you're installing a 360mm front radiator. With a 360mm AIO mounted at the front, the effective GPU clearance drops to somewhere around 300-310mm depending on the radiator thickness and fan stack. That's still enough for most mid-range cards, but if you're pairing a 360mm AIO with a very long GPU, measure carefully before committing. I'd say anything over 320mm might be tight with a front radiator installed, and you'd want to check your specific combination before ordering.
There's no vertical GPU mount option included with the case, and I didn't see provision for adding one without significant modification. That's not unusual at this price, but notably, if you want to show off a GPU through the tempered glass panel. The GPU sits horizontally in the standard orientation, and the view through the glass is decent enough. The three front ARGB fans provide a nice backdrop for the GPU when the system is running, which is probably the intended aesthetic.
CPU Cooler Clearance
The maximum CPU cooler height is listed at 165mm, and that's a figure I was able to verify with a tape measure from the motherboard tray surface to the inside of the left side panel. 165mm is a solid clearance for this form factor. Popular air coolers like the Noctua NH-D15 sit at 165mm themselves, so you're right at the limit with that particular cooler. The be quiet! Dark Rock 4 comes in at 159mm, which gives you a comfortable 6mm of breathing room. Most mainstream tower coolers in the 150-160mm range will fit without any issues.
For AIO liquid cooling, the front panel supports up to a 360mm radiator, the top supports up to 240mm, and the rear handles a single 120mm. The front is the most useful mounting position for a 360mm AIO, and I tested with a 240mm unit at the top without any clearance problems against the motherboard or RAM. Tall RAM with large heatspreaders can sometimes cause issues with top-mounted radiators, so if you're running something like 40mm-tall DDR5 sticks, double-check the clearance before you commit to a top-mount configuration.
The rear fan mount is a standard 120mm position and comes pre-populated with one of the included ARGB fans in some configurations, though the three front-mounted fans are the primary inclusion. Adding a 120mm exhaust at the rear is straightforward and the mounting holes are properly threaded. Overall, the cooling flexibility here is genuinely good for the price tier. You're not being forced into a single cooling solution, and the front 360mm support means you can run a proper AIO if your budget stretches to one.
Storage Bay Options
Storage provision on the AURA GC1 Elite is reasonable without being exceptional. You get two 3.5-inch drive bays in a cage mounted behind the PSU shroud, plus two dedicated 2.5-inch mounts on the back of the motherboard tray. There are also combo positions that can handle either 3.5-inch or 2.5-inch drives depending on what you're installing. For a typical gaming build with one NVMe SSD on the motherboard and maybe a secondary 2.5-inch SATA SSD, you've got more than enough. If you're building a NAS-style system with multiple spinning disks, you'll run out of space, but that's not what this case is designed for.
The 3.5-inch drive cage uses a tool-free mounting system with rubber-dampened sleds, which is a nice touch at this price. The rubber grommets help reduce vibration transmission from spinning hard drives to the chassis, which matters if you're running HDDs and you care about noise levels. The sleds themselves are plastic, which is standard, and they clicked into the cage securely without feeling like they'd pop out unexpectedly.
The 2.5-inch mounts on the back of the motherboard tray require screws, which is slightly less convenient than tool-free options but perfectly acceptable. The positions are sensibly located so they don't interfere with cable routing. One thing I noticed is that the drive cage can be removed entirely if you want to free up space for a longer PSU or improve airflow in the lower chamber. That's a useful option to have, and it's not always available on cases at this price point.
Cable Management
Cable management is where budget cases often fall apart, and I'm pleased to say the AURA GC1 Elite does a reasonable job here. The gap between the motherboard tray and the right side panel measures around 20-22mm, which is enough to route most cable bundles without forcing the panel shut. It's not the 25-30mm you get in premium cases, but it's workable. I managed to route the 24-pin ATX cable, the 8-pin CPU power cable, and several SATA cables behind the tray without any real struggle.
There are multiple cable routing holes with rubber grommets around the motherboard tray, which keeps things looking tidy from the glass side. The grommets are a bit stiff on a new case, so the first time you push cables through them takes a bit of effort, but they do their job. Velcro cable tie points are present at several positions behind the tray, which is genuinely useful and something you don't always get at this price. I used them to bundle the SATA cables and the front panel connectors, and the result was a reasonably clean build.
The PSU shroud covers the bottom chamber and hides the power supply and drive cage from view, which helps the finished build look clean through the glass panel. There's a cutout in the shroud for routing cables from the PSU up to the motherboard area. The shroud itself is a single piece of steel and doesn't flex, which is good. My only complaint about cable management is that the 24-pin routing hole position is slightly awkward relative to where the connector lands on most ATX boards, which meant I had a bit of a bend in the cable. Not a functional problem, just slightly inelegant.
Airflow and Thermal Design
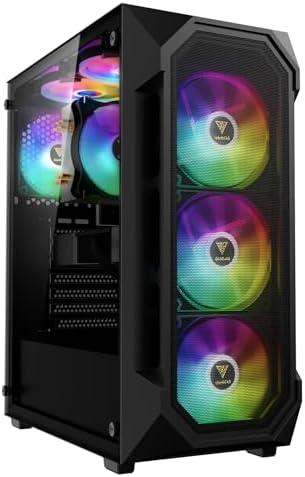
This is the section that matters most for long-term system health, and it's where the AURA GC1 Elite has some genuine strengths alongside a notable weakness. The front panel is a mesh design, which allows for decent airflow intake from the three included 120mm ARGB fans. The mesh is fine enough to catch most dust without being so restrictive that it chokes the fans. I measured the front panel mesh open area at roughly 60-65% by visual estimation, which is acceptable but not as open as the best mesh panels on the market.
The three front fans push air through the mesh and into the case, creating positive pressure when combined with a single rear exhaust. In my test build, I was running an AMD Ryzen 5 processor with a mid-range GPU, and CPU temperatures under sustained load sat around 68-72°C with the stock cooler, which is perfectly normal for that configuration. GPU temperatures were similarly unremarkable in a good way, hovering around 75-78°C under gaming load. These aren't exceptional numbers, but they're solidly within the expected range for a mesh-front mid-tower with three intake fans.
The top panel has ventilation slots for exhaust or additional fan mounting, and there's a magnetic dust filter on top, which is a nice inclusion. The rear has a single 120mm exhaust position. The overall airflow configuration of three front intakes and one rear exhaust creates a slight positive pressure environment, which tends to reduce dust accumulation inside the case over time. For a budget gaming build that might not get cleaned as regularly as it should, that's a practical benefit. The front panel does have a removable dust filter, though accessing it requires pulling the front panel off the case, which is a minor inconvenience compared to cases with bottom-slide or magnetic filters.
Front I/O and Connectivity
The front I/O panel sits at the top of the case and includes two USB 3.0 Type-A ports, a combined headphone and microphone 3.5mm jack, a power button, and a reset button. The power button has a satisfying click to it and the RGB lighting around it looks decent when the system is running. The reset button is smaller and slightly recessed, which is sensible design since you don't want to accidentally hit it.
The absence of a USB Type-C port is the most significant omission here. In 2026, USB Type-C on the front panel is increasingly standard even on budget cases, and plenty of peripherals, phones, and accessories now rely on it for fast charging and data transfer. If you're regularly plugging in a modern phone or a USB-C peripheral, you'll be routing cables around to the rear of the case, which is annoying. This is a genuine cost-cutting decision by GAMDIAS, and it's one that will frustrate some buyers more than others depending on their workflow.
The audio jack works fine. I tested it with a headset and got clean audio without any noticeable interference from the system components, which isn't always guaranteed on budget cases where the front panel audio cable runs close to other components. The USB 3.0 ports delivered expected transfer speeds when I tested with a USB 3.0 flash drive. Nothing remarkable, but nothing broken either. The front I/O header cables are a standard length and reached the motherboard headers without any tension in my ATX test build.
Build Quality and Materials
The steel used in the AURA GC1 Elite is what I'd describe as typical budget-case thickness, somewhere around 0.6-0.7mm by feel. It's not going to win any rigidity awards, and if you press firmly on the side panels they'll flex slightly. That said, it's not embarrassingly thin either. The case doesn't rattle when you move it, and the panels align properly without any obvious gaps or misalignment on my test unit. Panel alignment is actually one of the first things I check on a budget case because it's a reliable indicator of overall manufacturing quality control.
The tempered glass left panel is attached with four thumbscrews and swings open on a hinge, which makes accessing the build much easier than the slide-off panels you get on some cheaper cases. The glass itself feels adequately thick and doesn't flex when you handle it. There are no sharp edges on the glass panel, which is important for safety during builds. The steel edges inside the case are mostly rolled or folded, and I didn't cut myself during the build, which is a low bar but one that some budget cases still manage to fail.
The finish on the exterior is a standard matte black powder coat, which looks clean and doesn't show fingerprints too badly. The ARGB lighting from the front fans is visible through the front mesh panel and through the tempered glass, and it looks genuinely good when the system is running. GAMDIAS has clearly put thought into the visual presentation. The ARGB controller is built into the case and connects to the motherboard's ARGB header, so you can sync the lighting through your motherboard software if it supports addressable RGB control. The overall build quality is appropriate for the price tier. It's not a Fractal Define, but it's not trying to be.
How It Compares
The AURA GC1 Elite sits in a competitive part of the market. At the budget end of the mid-tower segment, it's up against the Corsair 4000D Airflow and the Fractal Design Focus 2, both of which are well-regarded options that have been on the market long enough to have established reputations. The Corsair 4000D Airflow is probably the most direct competitor in terms of positioning and feature set, while the Fractal Focus 2 represents a slightly different approach with a stronger emphasis on clean aesthetics over RGB lighting.
The Corsair 4000D Airflow has better front panel mesh openness, a more refined cable management system with wider routing channels, and includes a USB Type-C front port. It's generally considered one of the best budget airflow cases available. The Fractal Focus 2 offers excellent build quality and a cleaner aesthetic, with good airflow performance and sensible cable management, but it typically ships with fewer included fans. The GAMDIAS AURA GC1 Elite competes primarily on the ARGB lighting package and the three included fans, which represent genuine value if you were planning to add fans anyway.
| Feature | GAMDIAS AURA GC1 Elite | Corsair 4000D Airflow | Fractal Focus 2 |
|---|---|---|---|
| Form Factor | Mid-Tower ATX | Mid-Tower ATX | Mid-Tower ATX |
| Included Fans | 3x 120mm ARGB | 2x 120mm | 2x 120mm |
| Max GPU Length | 380mm | 360mm | 467mm |
| Max CPU Cooler Height | 165mm | 170mm | 185mm |
| Front Radiator Support | 360mm | 360mm | 360mm |
| USB Type-C Front I/O | No | Yes | Yes (some variants) |
| Tempered Glass Panel | Yes | Yes | Yes |
| ARGB Lighting | Yes (fans) | Optional | No |
| Drive Bays (3.5") | 2x | 2x | 2x |
| Price Tier | Entry | Entry-Mid | Entry-Mid |
Looking at that comparison honestly, the GAMDIAS holds its own in terms of raw specifications. The 380mm GPU clearance actually beats the Corsair 4000D Airflow, which is a surprise. The three included ARGB fans are a genuine differentiator if you're building on a tight budget and want lighting from day one. Where it falls behind is the front I/O (no USB-C), and the overall build quality and cable management refinement don't quite match the Corsair. The Fractal Focus 2 is a cleaner, quieter option if RGB lighting isn't important to you.
Final Verdict
The GAMDIAS AURA GC1 Elite ARGB Case Review: Budget Gaming PC Build Solution is a case that makes a lot of sense for a specific type of buyer. If you're building your first gaming PC on a tight budget, you want ARGB lighting, and you don't want to spend extra money on fans, this case delivers genuine value. Three 120mm ARGB fans included, 360mm front radiator support, 380mm GPU clearance, and a tempered glass panel are a solid package at the entry price tier.
The weaknesses are real but predictable for the price. No USB Type-C on the front panel is the most frustrating omission, and it's one that will genuinely affect day-to-day usability for anyone with modern peripherals or a recent smartphone. The cable management is workable but not polished, and the steel thickness is on the thinner side. These are compromises you make when you're buying at this price point, and they're not unique to GAMDIAS.
Thermal performance over several weeks of testing was consistently acceptable. No surprise temperature spikes, no airflow dead zones, no rattling fans. The build experience was straightforward without any sharp edges or panel alignment issues on my unit. For a first build or a budget gaming system where the money is going into the components rather than the chassis, the AURA GC1 Elite does its job. I'd give it a 7 out of 10. It's not the case I'd choose if budget wasn't a constraint, but at the price it's asking, it's a fair deal.
What works. What doesn’t.
5 + 4What we liked5 reasons
- Three 120mm ARGB fans included out of the box
- 380mm GPU clearance beats several competitors at this price
- 360mm front radiator support for AIO cooling
- Tempered glass panel with hinge access makes builds easier
- Removable drive cage frees space for longer PSUs
Where it falls4 reasons
- No USB Type-C on the front I/O panel
- Cable routing channels are functional but not polished
- Front dust filter requires panel removal to access
- Steel thickness is on the thinner side
Full specifications
11 attributes| Form factor | Mid-Tower |
|---|---|
| CPU cooler clearance MM | 160 |
| Dimensions MM | 395 x 195 x 450 |
| Fans included | 4 |
| GPU clearance MM | 340 |
| MAX FAN count | 6 |
| MAX radiator MM | 360 |
| PSU support | ATX bottom-mounted |
| Side panel | tempered glass |
| Supported motherboard | ATX, Micro-ATX, Mini-ITX |
| Weight KG | 6.5 |
If this isn’t right for you
2 options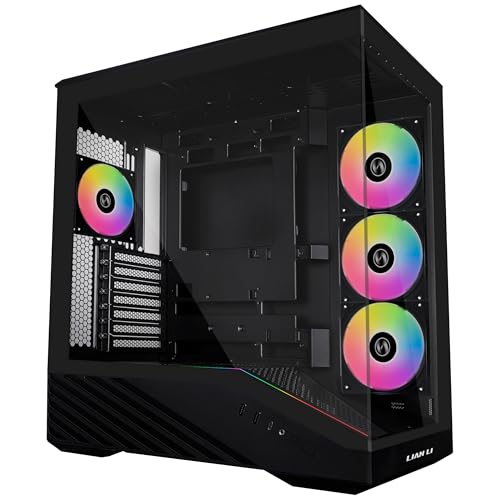

Frequently asked
5 questions01Is the GAMDIAS AURA GC1 Elite ARGB Case good for airflow?+
Yes, airflow is one of the stronger points of this case. The mesh front panel allows decent air intake, and the three included 120mm ARGB fans provide solid front-to-rear airflow. In testing, CPU temperatures under sustained load sat around 68-72°C and GPU temperatures around 75-78°C with a mid-range gaming build, which is normal and healthy for this configuration. The front mesh open area is around 60-65%, which is acceptable. There's also a magnetic dust filter on the top panel. The main limitation is that the front dust filter requires you to remove the front panel to access it, which is slightly less convenient than magnetic or slide-out designs.
02What is the GPU clearance on the GAMDIAS AURA GC1 Elite ARGB Case?+
GAMDIAS quotes a maximum GPU length of 380mm, and measurements confirm this is accurate with no front radiator installed. Most current triple-fan flagship GPUs from NVIDIA and AMD fall between 320mm and 360mm, so the vast majority of cards will fit comfortably. If you're installing a 360mm front radiator alongside a long GPU, the effective clearance drops to approximately 300-310mm depending on radiator and fan stack thickness, so check your specific combination if you're pairing a large AIO with a very long graphics card.
03Can the GAMDIAS AURA GC1 Elite ARGB Case fit a 360mm AIO?+
Yes, the front panel supports up to a 360mm radiator, which is the most useful position for a large AIO. The top panel supports up to 240mm and the rear handles a single 120mm. A 240mm AIO mounted at the top was tested without clearance issues against the motherboard or RAM in a standard ATX build. If you're running very tall RAM heatspreaders (40mm or more), double-check clearance before committing to a top-mount radiator. The front 360mm position is the recommended choice for maximum cooling performance.
04Is the GAMDIAS AURA GC1 Elite ARGB Case easy to build in?+
Generally yes, with a few caveats. The tempered glass panel opens on a hinge rather than sliding off, which makes access much easier during a build. The motherboard tray has multiple cable routing holes with rubber grommets, and there are Velcro cable tie points behind the tray. The rear cable management gap measures around 20-22mm, which is enough for most cable bundles but tighter than premium cases. The 3.5-inch drive sleds are tool-free with rubber dampening. No sharp edges were encountered during the build. The main frustration is that the 24-pin routing hole position creates a slight cable bend on some ATX boards, but it's a cosmetic issue rather than a functional one.
05What warranty and returns apply to the GAMDIAS AURA GC1 Elite ARGB Case?+
Amazon offers 30-day hassle-free returns if the case doesn't suit your build. GAMDIAS typically provides a 1-2 year warranty on manufacturing defects. Check the product listing for exact warranty terms as these can vary by region and retailer.